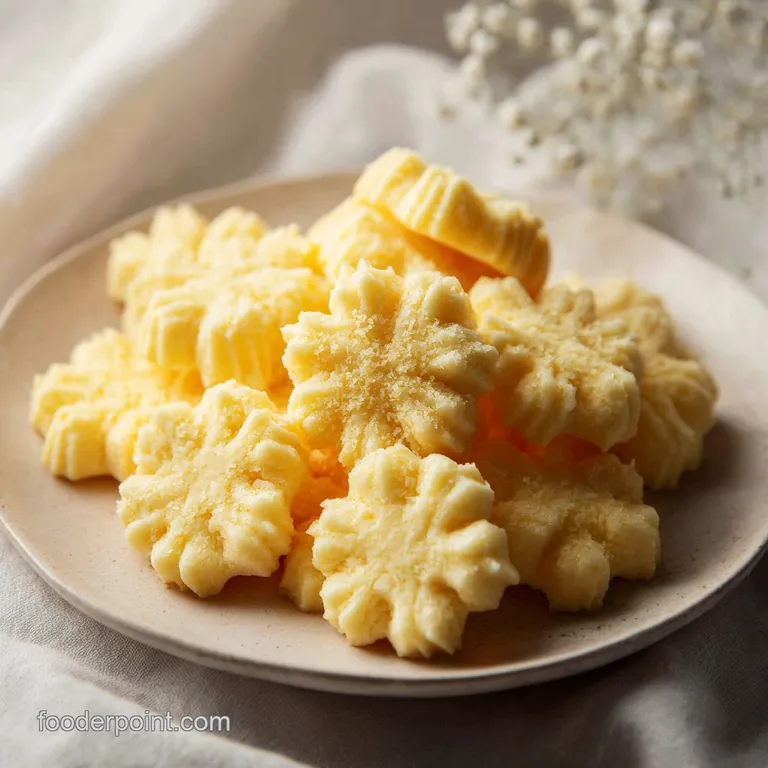
Danish Butter Cookies: Crispy and Velvety
- Time: Active 50 minutes, Passive 12 minutes, Total 62 minutes
- Flavor/Texture Hook: Shatter crisp edges with a velvety, melt away center
- Perfect for: Holiday gifting, afternoon tea, or beginner bakers looking to master technique
- The Only Butter Cookies Recipe You Need
- Why Other Recipes Often Fail
- Key Recipe Stats and Yields
- The Core Ingredients for Success
- Essential Gear for the Kitchen
- Step-by-Step From Prep to Plate
- Pro Troubleshooting and Common Fixes
- Fun Twists on the Classic
- Storing Your Treats for Later
- Elegant Serving and Gifting Ideas
- Recipe FAQs
- 📝 Recipe Card
The Only Butter Cookies Recipe You Need
Forget everything you have been told about needing expensive, high fat European butters or rare flours to achieve that bakery style snap. The real secret to a world class butter cookies recipe is not actually in the price tag of your ingredients, but in how you treat them before they ever see the heat of the oven.
Most people assume that butter needs to be soft and squishy to cream properly, but that is the first mistake that leads to greasy, flat discs.
When you walk into a kitchen where these are baking, the aroma is thick enough to lean against. It is a warm, toasted sugar scent mixed with the floral depth of vanilla bean paste.
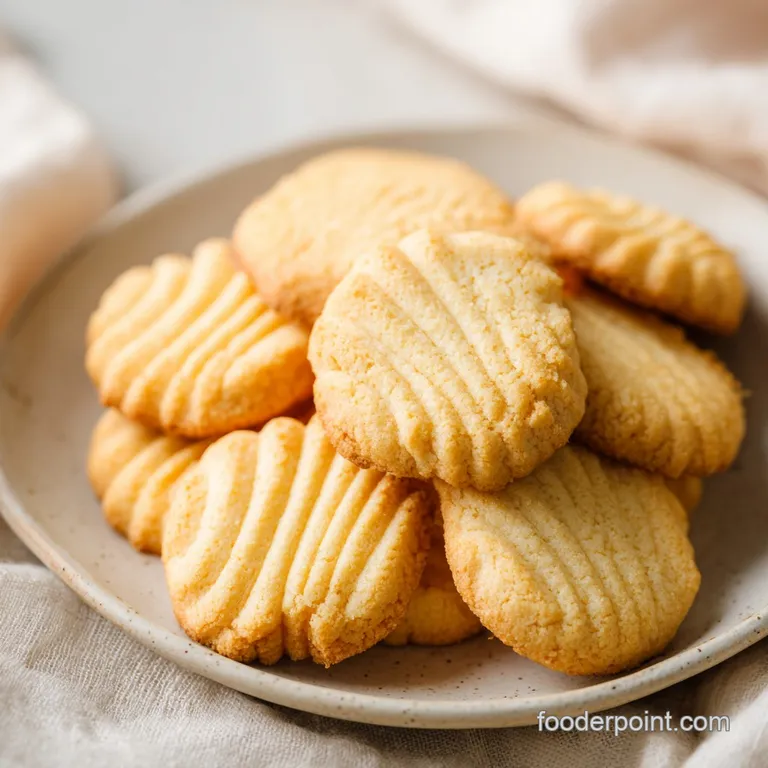
I remember the first time I realized that the "mahogany" edge that deep, dark golden ring wasn't burnt; it was the concentrated essence of butter and sugar caramelizing together. It provides a bitter sweet contrast to the rich, pale center.
This recipe is designed to give you those sharp, defined ridges that look like they came from a professional patisserie. We are building flavor in layers: first the air, then the fat, then the aromatics, and finally the structure. It’s a rhythmic process that feels more like a creative outlet than a chore.
You’ll see the dough transform from a yellow clump into a pale, voluminous cloud, and that’s when you know you’ve won.
Why Other Recipes Often Fail
Air Incorporation: Beating the butter for a full 5 minutes creates a network of tiny air bubbles that expand in the oven. This provides lift without using chemical leaveners like baking powder, which can muddle the pure buttery flavor.
Temperature Regulation: Using slightly cool butter around 18°C allows it to hold onto air bubbles more effectively than warm, greasy butter. If the fat is too soft, the air just escapes, leaving you with a heavy, dense cookie.
Starch Hydration: Allowing the flour to sit in the dough briefly before the final chill ensures the moisture is evenly distributed. This prevents "hot spots" of dry flour and creates a uniform, shatter like texture across the entire batch.
The Double Chill: Chilling the dough after it is piped, rather than before, locks the shape in place. This ensures those beautiful star tip ridges don't melt into a puddle the second they hit 175°C.
| Method | Time | Texture | Best For |
|---|---|---|---|
| Stand Mixer | 12 mins | Ultra light and airy | Professional, sharp ridges |
| Hand Mixer | 18 mins | Medium crisp | Casual home baking |
| By Hand | 30 mins | Dense and short | Rustic, hand shaped discs |
Choosing the right method depends on your patience. While a stand mixer does the heavy lifting, a hand mixer works if you're willing to put in the extra minutes to reach that pale, whipped cream stage. The texture of these is quite different from shortbread cookies, as the inclusion of an egg adds a specific "snap" that shortbread lacks.
| Ingredient | Science Role | Pro Secret |
|---|---|---|
| Unsalted Butter | Tenderizer and flavor carrier | Keep it at 18°C for maximum air retention |
| Extra Fine Sugar | Sweetener and structural support | Finer grains dissolve faster, creating a smoother crumb |
| All Purpose Flour | Provides the skeletal structure | Spoon and level to avoid a dry, crumbly dough |
Key Recipe Stats and Yields
This recipe is precisely calibrated to yield exactly 24 cookies when using a standard open star tip. It’s a manageable amount for a single baking sheet, meaning you don’t have to worry about your dough sitting out and getting too warm while waiting for its turn in the oven.
If you are looking for a more substantial dessert, this dough actually works beautifully as the base for a soft chewy cookie cake, though you would skip the piping bag and press it into a pan instead. For the classic version, though, stick to the measurements below to ensure the hydration levels are perfect for piping.
- Yield: 24 cookies
- Serving Size: 1 cookie (approx. 25g)
- Prep Time:50 minutes
- Cook Time:12 minutes
- Total Time:62 minutes
The Core Ingredients for Success
Selecting high-quality ingredients is important, but understanding their role is what makes you a better baker. For this butter cookies recipe, we are using grass fed butter because it has a higher yellow pigment and a more pronounced "grassy" sweetness that shines through in such a simple dough.
- 226g Unsalted grass fed butter: Slightly cool to the touch. Why this? Provides the foundational flavor and the necessary fat for a melt away texture.
- 100g Extra fine granulated sugar: Also known as caster sugar. Why this? Its smaller crystals aerate the butter more efficiently than standard granulated sugar.
- 1 Large egg: Must be at room temperature. Why this? Acts as an emulsifier to bind the fat and flour into a cohesive dough.
- 2 tsp Pure vanilla bean paste: Look for the little black specks. Why this? Offers a more intense, floral aroma than standard extract.
- 0.5 tsp Fine sea salt: Not table salt. Why this? Enhances the sweetness and cuts through the richness of the butter.
- 250g All purpose flour: Spooned into the cup and leveled with a knife. Why this? Provides just enough gluten to hold the shape without becoming tough.
| Original Ingredient | Substitute | Why It Works |
|---|---|---|
| Unsalted Butter | Salted Butter | Same fat content; omit the extra 0.5 tsp of sea salt |
| Vanilla Bean Paste | Vanilla Extract | Same volume; slightly less visual "speckle" and floral depth |
| Extra Fine Sugar | Regular Granulated | Pulse in a blender for 30 seconds to mimic the fine texture |
Using the right sugar is a small detail that pays massive dividends. If your sugar crystals are too large, they won't fully dissolve during the short 12 minute bake time, which can lead to a slightly gritty texture rather than the silky finish we’re aiming for.
Essential Gear for the Kitchen
While you can technically make these with a bowl and a wooden spoon, your arms will certainly feel the burn. A stand mixer is truly the hero of this recipe because it allows you to walk away while the butter and sugar undergo their transformation.
You will also need a heavy gauge aluminum baking sheet. Thin, dark pans absorb heat too quickly, which will cause the bottoms of your cookies to brown before the centers are even set. A silicone mat or parchment paper is non negotiable; these cookies are high in fat and will stick to a bare pan like glue.
Finally, a sturdy piping bag is essential. I prefer the disposable ones for easy cleanup, but make sure they are thick enough to handle the pressure of the dough.
Chef Tip: If your dough is too stiff to pipe, don't microwave it! Simply hold the piping bag in your hands for a minute. The warmth from your palms will soften the butter just enough to let it flow through the star tip.
Step-by-step From Prep to Plate
- Place the 226g of slightly cool butter and 100g of extra fine sugar into the bowl of a stand mixer. Beat on medium speed for 4-5 minutes until the mixture looks like whipped cream.Note: This is where you build the air that makes the cookies light.
- Stop the mixer and scrape down the sides of the bowl with a flexible spatula. Ensure no clumps of yellow butter remain at the bottom.
- Add the room temperature egg, 2 tsp of vanilla bean paste, and 0.5 tsp of sea salt. Beat on medium high until the mixture is glossy and completely smooth.
- Lower the mixer speed to the minimum. Gradually pour in the 250g of all purpose flour.Note: Stop the mixer the moment the last white streak disappears to avoid gluten development.
- Fit a large piping bag with an open star tip (like an Ateco #826). Fill the bag halfway to keep the pressure manageable.
- Pipe 24 rosettes onto a lined baking sheet, spacing them about 3 cm apart. The cookies don't spread much, but they need room for air circulation.
- Place the entire baking sheet in the refrigerator for 30 minutes. Do not skip this; it sets the butter so the ridges stay sharp.
- Preheat your oven to 175°C while the cookies chill. Ensure your oven rack is in the center position.
- Bake for 12 minutes until the edges turn a deep mahogany and the centers are pale gold.
- Transfer the sheet to a wire rack and let them cool completely. They will firm up and become shatteringly crisp as they reach room temperature.
Pro Troubleshooting and Common Fixes
Why Your Cookies Spread Too Much
If your rosettes turned into flat puddles, the most likely culprit is the temperature of the butter or a skipped chilling step. When butter is too warm, it loses its ability to hold the air you worked so hard to whip in.
Another cause could be over greasing your baking sheet; the dough needs a little "grip" to hold its shape, which is why parchment or a silicone mat is better than a greased pan.
| Problem | Root Cause | Solution |
|---|---|---|
| Tough or Chewy | Over mixing the flour | Mix only until flour streaks disappear; do not overwork |
| Greasy Bottoms | Oven temperature too low | Calibrate your oven; ensure it is at 175°C before baking |
| Blurry Ridges | Skipped the 30 min chill | Always chill the piped shapes before they enter the oven |
A common mistake is using "spread" or "tub" butter. These products often have added water or oil, which completely throws off the fat to flour ratio of this butter cookies recipe. Always stick to solid blocks of unsalted butter for the most predictable results.
Common Mistakes Checklist:
- ✓ Using butter that is melted or "greasy" rather than cool and solid.
- ✓ Adding the egg while it is still cold from the fridge (this curdles the butter).
- ✓ Measuring flour by volume instead of weight (leads to dry, un pipeable dough).
- ✓ Baking on a dark colored pan which scorches the bottoms.
- ✓ Pulling them out of the oven when they are still entirely pale.
Fun Twists on the Classic
Once you have mastered the base butter cookies recipe, the possibilities for customization are endless. You can easily turn these into chocolate dipped delights by melting 100g of high-quality dark chocolate and dipping half of each cooled cookie into it.
Sprinkle a little flaky sea salt or crushed pistachios on top before the chocolate sets for a truly velvety finish.
For a holiday twist, you can replace the vanilla bean paste with a teaspoon of almond extract and half a teaspoon of ground cardamom. This gives the cookies a sophisticated, Scandinavian profile that pairs beautifully with a hot cup of coffee.
Another favorite of mine is the "Botanical" version: fold in a tablespoon of finely chopped culinary lavender or dried rose petals into the flour before mixing.
| Fresh Version | Shortcut Version | Flavor Impact |
|---|---|---|
| Vanilla Bean Paste | Vanilla Extract | Paste gives a deeper, more "gourmet" aromatic profile |
| Whipped 5 mins | Whipped 1 min | 5 mins creates a significantly lighter, crisper texture |
| 30 min Chill | No Chill | Chilling preserves the visual "wow factor" of the ridges |
If you want a citrus kick, zest a whole lemon or orange directly into the sugar before creaming. The sugar crystals will rub against the zest, releasing all those fragrant oils and infusing the entire cookie with a vibrant, bright flavor.
Storing Your Treats for Later
These cookies are surprisingly hardy if kept away from their number one enemy: humidity. To maintain that signature "shatter" crispness, store them in a tin rather than a plastic container. Plastic tends to trap residual moisture, which can make the butter cookies turn soft and limp within a day.
- Countertop: Store in an airtight tin for up to 7 days.
- Freezer (Baked): Place in a freezer safe bag for up to 2 months. Thaw at room temperature for 15 minutes before serving.
- Freezer (Dough): You can pipe the rosettes onto a tray, freeze until solid, and then toss them into a bag. Bake directly from frozen, adding 2-3 minutes to the total cook time.
Zero Waste Tip: If you find yourself with broken cookie crumbs at the bottom of the tin, don't throw them away! Save them in a jar in the freezer. They make an incredible topping for vanilla bean ice cream or can be used as a "crust" for a mini cheesecake.
You can even pulse them into a fine powder and use them to replace a portion of the flour in your next batch of brownies for a buttery boost.
Elegant Serving and Gifting Ideas
There is something inherently nostalgic about a butter cookies recipe, perhaps because of those iconic blue tins we all remember from childhood. To recreate that magic, I love to stack these in small cellophane bags tied with a simple velvet ribbon. They make the most charming "thank you" gifts or party favors.
For a formal tea service, arrange the cookies in a circular pattern on a white porcelain platter. Place a small bowl of lemon curd or raspberry jam in the center for dipping. The tartness of the fruit preserves cuts through the rich, buttery finish of the cookie perfectly.
Decision Shortcut: If you want maximum crispness, bake until the mahogany edge is clearly visible (about 13 minutes). If you want a softer, melt away feel, pull them at 11 minutes when they are just starting to color.
If you want to use a cookie press, add 1 extra tablespoon of flour to the dough to help it release from the plates.
Remember that these cookies are best enjoyed with a warm beverage. The heat from tea or coffee slightly softens the butter as you take a bite, heightening the vanilla notes and creating a truly luxurious experience.
Whether you're baking them for a holiday or just a quiet Tuesday afternoon, the effort you put into the creaming and chilling stages will be evident in every single bite. Enjoy the process as much as the result!
Recipe FAQs
What are the ingredients for butter cookies?
This recipe uses six pantry staples. You will need 226g of unsalted grass fed butter, 100g of extra fine granulated sugar, one large room temperature egg, 2 tsp of pure vanilla bean paste, 0.5 tsp of fine sea salt, and 250g of all-purpose flour.
Are these butter cookies suitable for diabetics?
No, these cookies are not suitable for a diabetic diet. They contain traditional granulated sugar and all-purpose flour, which will significantly impact blood glucose levels.
What are the common butter cookie mistakes?
Over mixing the flour and skipping the chill time are the biggest errors. If you enjoy the precision of mixing dough here, you can refine your technique with our chewy chocolate chip cookies to see how different fats and mixing times alter texture.
How to make butter cookies with 3 ingredients?
Whisk together softened butter, granulated sugar, and flour to create a basic shortbread style dough. While these simplified versions exist, they lack the lift and emulsification provided by the egg and vanilla bean paste used in this specific recipe.
How to prevent cookies from losing their shape in the oven?
Chill the piped dough on the baking sheets for 30 minutes before baking. This solidifies the butter, which prevents the rosettes from spreading and ensures the star tip ridges stay sharp.
Is it true that I should use a mixer for this dough?
Yes, a stand mixer is necessary for the initial aeration process. Beating the butter and sugar for 4-5 minutes until pale and voluminous is the only way to achieve the correct light, airy structure.
How to tell when the cookies are finished baking?
Bake until the edges turn a deep golden, mahogany color. You must allow them to cool completely on a wire rack after removing them from the oven to reach their maximum crispness.
Classic Danish Butter Cookies

