Cookies and Cream Ice Cream: Ultra Creamy No Churn
- Make Incredible Cookies and Cream Ice Cream
- Why This Recipe Beats Store Bought
- Essential Recipe Specs and Timing
- Ingredients and Smart Substitutions
- Essential Tools for Fluffy Results
- Step by Step Cooking Guide
- Fix Common Texture and Flavor Issues
- Creative Ways to Customize Flavor
- How to Store Your Treat
- Best Ways to Serve This
- Recipe FAQs
- 📝 Recipe Card
Make Incredible Cookies and Cream Ice Cream
Imagine a humid July evening where the air is so thick you can practically feel it sticking to your skin. The sun is finally dipping below the horizon, painting the sky in shades of bruised purple and hazy orange.
You’re sitting on the back porch with friends, and the only thing that could possibly make the moment better is something cold, sweet, and ridiculously creamy. That is exactly where this recipe comes in. It is the ultimate "emergency" dessert that doesn't feel like a compromise.
Discover how to make incredible Cookies and Cream Ice Cream with no churn method. There is something almost magical about taking three or four basic pantry staples and turning them into a velvety frozen treat that rivals the fancy pints in the gourmet aisle. When I first started making this, I was skeptical.
I thought ice cream required a heavy machine and salt rock tantrums, but this method proved me wrong. It is all about the texture, that specific contrast between the cloud like base and the crunchy, chocolatey shatter of the cookies.
We are skipping the eggs, the tempering, and the waiting for a canister to freeze for twenty four hours. Instead, we are leaning into the science of aeration and fat content. This recipe is for the moments when you want to be the hero of the dinner party without spending three hours hovering over a stove.
It is approachable, forgiving, and honestly, a little bit addictive once you realize how easy it is to customize.
Why This Recipe Beats store bought
This no churn method relies on two heavy hitters: aeration and freezing point depression. When we whip the heavy cream, we are trapping millions of tiny air bubbles inside a network of fat globules.
This structure is what gives the ice cream its "scoopability." Without that air, you’d just have a solid block of frozen milk. The sweetened condensed milk plays the second vital role.
Because it has a high sugar content and very little water, it lowers the freezing point of the mixture, ensuring the final result stays soft and silky rather than turning into a tray of ice cubes.
- Fat Stabilization
- The high fat content in the 475ml of heavy whipping cream (at least 36%) creates a sturdy foam that doesn't collapse when you fold in the heavier ingredients.
- Low Crystallization
- Sweetened condensed milk is cooked down until most of the water is gone, which means there are fewer water molecules available to form large, crunchy ice crystals.
- Texture Contrast
- By splitting the cookies into "dust" and "shards," we ensure that every single bite has a deep cocoa flavor while still providing those big, satisfying chunks we all crave.
| Method | Time | Texture | Best For |
|---|---|---|---|
| No Churn | 15 mins prep | Airy and Velvety | Quick cravings and beginners |
| Traditional Churn | 45 mins prep + churn | Dense and Rich | Hard pack style purists |
| Liquid Nitrogen | 5 mins | Ultra Smooth | Science fans and show stopping parties |
The beauty of this specific approach is that it requires zero specialized equipment. You don't need a bulky machine taking up space in your pantry. If you have a bowl and a whisk (or an electric mixer), you are already ninety percent of the way to dessert heaven.
It’s a wonderful project for kids too, as they can help with the cookie crushing phase without any risk of heat or sharp blades.
Essential Recipe Specs and Timing
Before we dive into the mixing bowl, let’s look at the numbers. Precision is your friend in the kitchen, even with simple recipes. You want to make sure your cream is as cold as possible I’m talking "top shelf of the fridge" cold.
If the fat is even slightly warm, those air bubbles won't hold, and you'll end up with a puddle instead of a cloud.
- Active Time: 15 minutes
- Passive Time: 6 hours (freezing)
- Total Time: 6 hours 15 mins
- Yield: 11 servings (plenty for a party or a very hungry family)
| Thickness | Freezing Temp | Rest Time | Visual Cue |
|---|---|---|---|
| 5 cm (in pan) | -18°C (0°F) | 6 hours | Edges pull away slightly |
| 8 cm (in tub) | -18°C (0°F) | 8 hours | Center is firm to the touch |
Giving the ice cream at least 6 hours is non negotiable. If you try to scoop it at the four hour mark, you’ll likely find a soft serve consistency that melts the second it hits the bowl. For the best experience, let it "ripen" in the freezer overnight.
This allows the flavors of the vanilla and the cocoa from the cookies to fully permeate the cream base.
Ingredients and Smart Substitutions
The ingredient list for this Cream Ice Cream is refreshingly short, but each component has a specific job to do. Don't be tempted to swap the heavy cream for half and half; you need that fat to create the structure. I’ve found that using a high-quality vanilla extract makes a world of difference here.
Since there is no cooking involved, the raw flavor of the vanilla really shines through.
- Heavy whipping cream (475ml): The structural foundation. Why this? High fat content is required for stable aeration and a creamy mouthfeel.
- Sweetened condensed milk (396g): The sweetener and softener. Why this? Sugar and reduced water content prevent the ice cream from freezing solid.
- Pure vanilla extract (1 tbsp): The aromatic backbone.
- Fine sea salt (0.25 tsp): The flavor balancer. Why this? A tiny amount of salt cuts through the sugar and makes the cream taste "milkier."
- Oreo cookies (22 total): The star of the show.
| Original Ingredient | Substitute | Why It Works |
|---|---|---|
| Heavy Cream | Full fat Coconut Cream | High fat content allows for whipping. Note: Adds a distinct coconut flavor. |
| Sweetened Condensed Milk | Coconut Condensed Milk | Similar sugar to liquid ratio. Note: Result will be slightly more beige in color. |
| Oreo Cookies | Any Chocolate Sandwich Cookie | Same texture and flavor profile. |
If you are looking for a different vibe after mastering this, you might enjoy trying a Shortbread Cookies recipe to crumble on top instead of mixing in. The buttery crunch of shortbread offers a totally different experience compared to the cocoa heavy Oreo.
Essential Tools for Fluffy Results

While you don't need an ice cream maker, having the right basic tools will make the process much smoother. I always recommend using a metal or glass bowl for whipping the cream. Plastic bowls can sometimes retain a thin film of oil, even after washing, which can prevent your cream from reaching its full volume.
- Electric hand mixer: Essential for getting those stiff peaks without a workout.
- Large mixing bowl: Chilled in the freezer for 20 minutes before starting.
- Rubber spatula: For the "folding" process crucial for not deflating the air.
- Food processor: To get that fine "cookie sand" texture (though a zip top bag and a rolling pin work in a pinch).
- 9x5-inch loaf pan: The classic vessel for no churn ice cream, allowing for even freezing.
Chef's Tip: Put your metal whisk attachments in the freezer along with the bowl. The colder everything is, the faster the fat molecules in the cream will bond together to trap air.
Step by step Cooking Guide
Now we get to the fun part. The process for this Cookies and Cream Ice Cream with no churn method is all about the "fold." We want to be gentle. Think of the whipped cream as a delicate balloon; if you stir too hard, you’ll pop all those bubbles you worked so hard to create.
- Prepare the cookies. Divide the 22 Oreos into two groups. Pulse 8 cookies in a processor until they are a fine sand. Roughly chop the remaining 14 cookies by hand into 1.5 cm shards.
- Chill your equipment. Place your mixing bowl in the freezer for about 20 minutes. This ensures the 475ml of heavy cream stays cold while whipping.
- Whip the cream. Pour the chilled cream into the cold bowl. Using the hand mixer on medium high, whip until stiff peaks form. You’ll know it’s ready when you lift the beaters and the cream stands straight up.
- Incorporate the base. Gently fold in the 396g of chilled sweetened condensed milk, 1 tbsp vanilla, and 0.25 tsp salt. Use a figure eight motion with your spatula.
- Add the cookies. Fold in both the fine cookie dust and the larger chunks. Stop as soon as they are evenly distributed to avoid over mixing.
- Transfer to pan. Pour the mixture into your 9x5-inch loaf pan. Smooth the top until it looks like a soft, white cloud dotted with chocolate.
- Freeze. Cover tightly with plastic wrap (touching the surface of the ice cream to prevent ice crystals) and freeze for 6 hours.
| Ingredient | Science Role | Pro Secret |
|---|---|---|
| Heavy Cream | Structural Aeration | Use 36%+ fat for the sturdiest peaks |
| Condensed Milk | Freeze Point Control | Chill it before mixing to keep the cream cold |
| Sea Salt | Flavor Enhancement | Finely ground salt dissolves faster in cold cream |
Once you've mastered the basic base, you can start playing with other Southern inspired flavors. If you love creamy textures, you might want to look into a Banana Pudding recipe for your next gathering. It shares that same comforting, velvety mouthfeel that makes these desserts so popular.
Fix Common Texture and Flavor Issues
Even with a recipe this simple, things can occasionally go sideways. The most common complaint with no churn ice cream is an "icy" or "gritty" texture. This usually happens if the cream wasn't whipped enough or if the mixture sat out too long before going into the freezer.
Why Your Ice Cream Is Icy
If your final result feels like a slushy rather than cream, it’s likely due to large ice crystals. This happens if the heavy cream was under whipped or if you used a low-fat substitute. Another culprit is "freezer burn," which occurs when air reaches the surface of the ice cream.
Always press your plastic wrap directly onto the surface of the mixture before freezing.
| Problem | Root Cause | Solution |
|---|---|---|
| Icy Texture | Under whipped cream | Whip until peaks are truly stiff and hold their shape |
| Too Soft | Warm ingredients | Ensure the condensed milk and cream are cold from the fridge |
| Too Sweet | Lack of balance | Increase sea salt to 0.5 tsp to cut the sugar |
Common Mistakes Checklist
- ✓ Using "whipped topping" instead of real heavy whipping cream.
- ✓ Forgetting to chill the bowl and beaters before starting.
- ✓ Stirring the mixture vigorously instead of gently folding.
- ✓ Using a shallow pan that allows the mixture to melt too quickly during serving.
- ✓ Skipping the salt it’s the secret to making the flavors "pop."
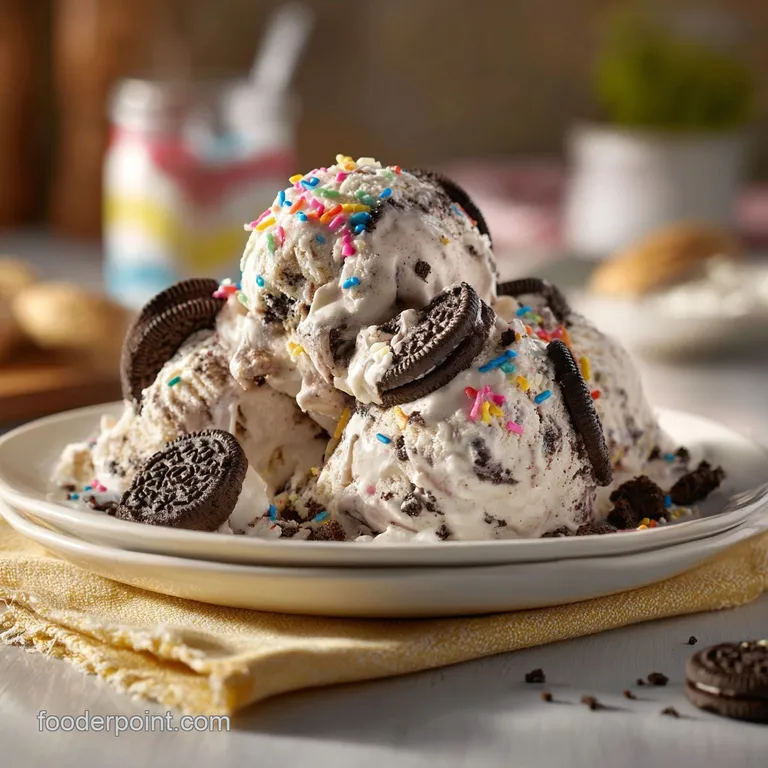
Creative Ways to Customize Flavor
Once you’ve got the hang of the base, the world is your oyster. This recipe is a blank canvas. I’ve seen people turn this into a "Midnight" version by using dark cocoa cookies and adding a tablespoon of black cocoa powder to the whipped cream. It looks stunning and tastes like a decadent truffle.
For a Refreshing Mint Twist
Add 1 teaspoon of peppermint extract and a few drops of green food coloring to the base before folding in the cookies. The combination of mint and chocolate is a classic for a reason, and it feels extra cooling on a hot day.
For the Ultimate Sundae
Serve a scoop of this ice cream between two warm, homemade cookies. I highly recommend using a soft cookie cake as a base or even crumbling pieces of it over the top for a "cookie on-cookie" extravaganza.
If you are feeling really adventurous, try adding a swirl of salted caramel or a handful of toasted pecans. The saltiness of the nuts contrasts beautifully with the sweet cream. Just remember to keep your "mix ins" to about 1.5 cups total so you don't weigh down the aerated cream too much.
How to Store Your Treat
Proper storage is the difference between a treat that lasts two weeks and one that tastes like "freezer" after two days. Because this ice cream doesn't have the stabilizers found in commercial brands, it is more susceptible to temperature fluctuations.
Storage: Keep the ice cream in the coldest part of your freezer (usually the back, away from the door). It will stay fresh and delicious for up to 2 weeks. After that, the texture may start to become a bit grainier as the air bubbles slowly escape.
Zero Waste: If you have a few broken Oreos at the bottom of the bag, don't toss them! Grind them into a fine powder and store them in a jar. This "cookie dust" is incredible as a topping for yogurt, oatmeal, or even stirred into your morning coffee for a mocha vibe.
Best Ways to Serve This
When it’s time to serve, don't go straight from the freezer to the bowl. No churn ice cream can be quite firm. Let the container sit on the counter for about 5 minutes. This "tempering" period allows the edges to soften just enough to get those perfect, round spheres with your scoop.
I love serving this in chilled glass bowls. If you want to go the extra mile, drizzle a little bit of warm chocolate ganache over the top. The heat from the sauce against the freezing ice cream creates a "shatter" effect that is incredibly satisfying.
It’s the kind of dessert that makes people quiet down because they’re too busy enjoying the texture.
Whether you are making this for a birthday, a movie night, or just because it's Tuesday, this recipe is a reminder that great food doesn't have to be complicated. It's about the right ingredients, a little bit of patience, and the joy of sharing something handmade.
So, grab your whisk and get started your future self will thank you when they open the freezer tonight.
Recipe FAQs
Is it true I must use an ice cream maker for this recipe?
No, this is a common misconception. This no-churn method relies on whipping heavy cream to create a stable, airy base, removing the need for a machine entirely.
How to achieve the perfect ice cream texture without an ice cream maker?
Whip your heavy whipping cream until stiff peaks form. This creates the structural, cloud like consistency needed to trap air, ensuring the final result is creamy rather than icy. If you enjoyed mastering the aeration technique here, see how we apply similar principles to create a creamy dessert.
How to keep the cookie pieces from getting soggy?
Keep your cookies separate from the base until the very last step. Fold the shards into the mixture gently and immediately transfer the container to the freezer to set, which prevents the moisture from fully softening the cookie structure.
Why is my ice cream too soft after 6 hours?
Check your freezer temperature and ensure the container is airtight. If you used a non-chilled bowl during the initial prep, the mixture may have lost volume, which compromises the final density and freezing point.
Is it necessary to pulse some of the cookies into sand?
Yes, this is essential for flavor distribution. The cookie sand infuses the entire base with cocoa notes, while the larger 1/2 inch shards provide the necessary textural contrast in every scoop.
How to prevent the whipped cream from deflating while mixing?
Use a rubber spatula to gently fold in the sweetened condensed milk and cookies. Never use a whisk or an electric mixer for this stage, as vigorous stirring will pop the bubbles and ruin your aeration.
Should I skip the sea salt in this recipe?
No, the salt is critical for flavor development. Even a small amount of fine sea salt creates a necessary contrast that makes the sweetness of the condensed milk and the cocoa in the Oreos truly pop.
No Churn Cookies And Cream Ice Cream