Salted Caramel Butter Bars: Buttery and Rich
- Time: Active 15 minutes, Passive 45 minutes, Total 60 minutes
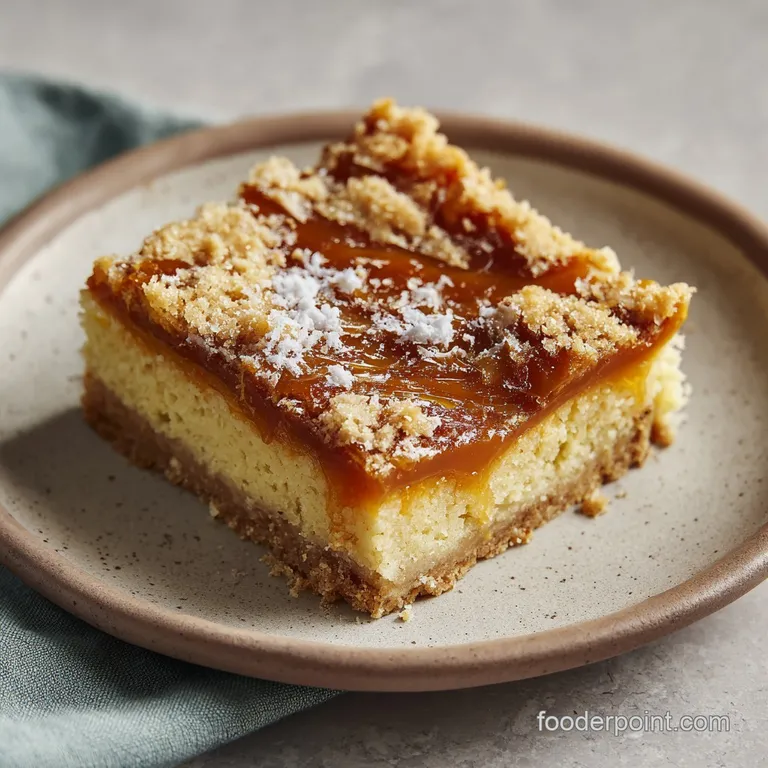
- Flavor/Texture Hook: Silky, gooey caramel tucked between crumbly, golden shortbread layers.
- Perfect for: Bake sales, holiday gifting, or a decadent weekend treat.
- Bake the Ultimate Salted Caramel Butter Bars Recipe
- Why This Buttery Contrast Actually Works So Well
- Quick Specs for Your Next Dessert Session
- The Essential Ingredients for Your Caramel Creation
- Essential Tools for the Perfect Butter Bar
- Step-by-Step Guide to Gooey Caramel Success
- Avoiding Common Pitfalls and Baking Mistakes
- Scaling Your Batch for Large Groups
- Flavor Myths and Baking Truths
- Tasty Variations to Customize Your Caramel Bars
- How to Keep Your Butter Bars Fresh
- Creative Ways to Present Your Sweet Treats
- Recipe FAQs
- 📝 Recipe Card
Bake the Ultimate Salted Caramel Butter Bars Recipe
Have you ever wondered why your brain does a little happy dance the moment salt hits a sugary surface? It isn't just about the contrast; it’s actually a biological trick where salt unlocks "sugar sensors" in your mouth that otherwise stay dormant.
I remember the first time I pulled these from the oven, the kitchen was thick with the scent of toasted sugar and browning butter, and I couldn't wait for them to cool. I burnt my tongue on a bubbling corner of caramel, but honestly, that first taste of the salted caramel butter bars recipe was worth every single sting.
We’ve all had those dessert bars that are just one note sweet, the kind that makes your teeth ache after two bites. This recipe is the antidote to that. We are talking about a thick, mahogany colored caramel that doesn't just run off the side but holds its own, sandwiched between a shortbread crust that manages to be both sturdy and melt in-mouth tender.
It’s a classic for a reason, but the small tweaks we’re making here, like the mix of granulated and powdered sugars in the base, will change how you think about shortbread forever.
I used to be terrified of making caramel until I realized that sweetened condensed milk is basically a cheat code for success. It provides a structural stability that traditional sugar and water caramels lack, making this recipe virtually foolproof even for beginner bakers.
Whether you are bringing these to a neighbor or hiding them in the back of the pantry so you don't have to share, these bars are the kind of treat that people will ask you for the recipe for years to come. Let’s get into the details of what makes these so special.
Why This Buttery Contrast Actually Works So Well
The magic of this recipe lies in the way we handle the fats and sugars to create distinct layers that don't turn into a soggy mess. It is a bit of a balancing act between the crisp base and the gooey filling, but the science is on our side if we follow a few simple rules.
- Fat to Flour Shielding: By creaming the butter and flour, we coat the flour particles in fat, which inhibits gluten development and results in that signature "short" crumbly texture.
- Dual Sugar Texture: Powdered sugar contains a tiny bit of cornstarch, which helps the crust stay tender and prevents it from becoming too hard or "snap like" after it cools.
- The Maillard Enhancement: Simmering the condensed milk with brown sugar causes a browning reaction that creates complex, nutty flavor compounds that simple white sugar can't provide.
- Starch Stabilization: The natural proteins in the milk act as emulsifiers, keeping the butter and sugar from separating during the over high heat baking process.
| Cooking Method | Active Time | Resulting Texture | Best Use Case |
|---|---|---|---|
| Classic Stovetop | 15 minutes | Thick, fudgy, and rich | Best for gifting and clean slices |
| Fast Microwave | 5 minutes | Softer, more sauce like | Best for immediate warm eating |
| Slow Cooker | 2 hours | Deeply caramelized, dark | Best for large batches or parties |
The difference between a "good" bar and a "legendary" bar often comes down to how you treat the caramel. If you rush the stovetop simmer, you’ll end up with a pale, overly sweet filling.
If you take those extra few minutes to reach that deep mahogany shade, you’re rewarded with a sophisticated bitterness that cuts through the rich butter.
| Ingredient | Science Role | Pro Secret |
|---|---|---|
| Sweetened Condensed Milk | Structural base | Don't use evaporated milk; they are not swappable! |
| Unsalted Butter | Moisture and richness | Use high-quality butter for a better flavor profile. |
| All Purpose Flour | Structure | Weigh your flour to avoid a dry, sandy crust. |
| Maldon Sea Salt | Flavor balancing | Add at the very end to keep the crystals intact. |
Quick Specs for Your Next Dessert Session
When you’re planning your baking day, knowing the specifics helps you manage your kitchen flow. These bars are rich, so while the yield says 16 servings, you can easily cut them into 24 smaller "bite sized" squares if you're serving a larger crowd.
Just remember that the cooling time is non negotiable if you cut them while warm, the caramel will flow like lava.
The "Flavor Map" for this recipe is quite intentional. You start with the neutral, buttery base, move into the intense, molasses heavy center, and finish with the sharp, clean bite of the sea salt. If you’ve ever enjoyed a Shortbread Lemon Bars recipe, you’ll recognize that familiar crumbly base, but the caramel adds a weight and richness that takes it into a whole different category of indulgence.
The Essential Ingredients for Your Caramel Creation
For the shortbread crust and the topping, you'll need the following: 1 cup unsalted butter, softened Why this? Provides the foundational flavor and creates a tender, flaky crumb. 0.5 cup granulated sugar Why this? Adds sweetness and helps with the golden brown
Crisping. 0.25 cup powdered sugar Why this? The cornstarch in it ensures a melt in-your mouth texture. 1 tablespoon vanilla extract Why this? A high amount to ensure the floral aroma survives the bake. 2 cups all purpose flour Why
This? The primary structure that holds the caramel in place. 0.5 teaspoon fine sea salt Why this? Seasons the dough so it isn't bland against the caramel.
For the gooey filling and finishing: 0.5 cup unsalted butter Why this? Emulsifies the caramel for a velvety, non sticky finish. 0.5 cup light brown sugar, packed Why this? Adds depth and a hint of molasses flavor. 14 oz sweetened condensed milk
Why this? The secret to a thick caramel that sets perfectly. 1 teaspoon Maldon flaky sea salt Why this? Provides the crucial salt to sugar contrast and crunch.
| Original Ingredient | Substitute | Why It Works |
|---|---|---|
| Light Brown Sugar | Dark Brown Sugar | Higher molasses content. Note: Will make the caramel darker and more intense. |
| Maldon Sea Salt | Fleur de Sel | Similar delicate crunch. Note: Slightly saltier, so use a bit less. |
| Unsalted Butter | Salted Butter | Can be used. Note: Omit the fine sea salt in the crust dough if using. |
Essential Tools for the Perfect Butter Bar
You don't need a professional kitchen to make these, but a few specific tools make the process much smoother. First, a 9x9-inch square baking pan is the ideal size. If you use a 9x13-inch pan, the layers will be far too thin and the caramel might overcook and become hard.
A heavy bottomed saucepan is also vital for the caramel. Thin pans have "hot spots" that can cause the condensed milk to scorch before it actually thickens. If you've ever tasted burnt milk, you know it's a flavor you can't hide. Finally, parchment paper is your best friend here.
Leave an overhang on two sides to create a "sling" so you can lift the entire block out of the pan once it’s cooled. This is the only way to get those clean, sharp edges we’re looking for.
Step-by-step Guide to Gooey Caramel Success
- Preheat your oven to 350°F (180°C) and line a 9x9-inch baking pan with parchment paper, making sure you have an overhang on the sides.
- Cream 1 cup of softened butter with the granulated sugar and powdered sugar in a large bowl. Note: Beat for about 3 minutes until the mixture looks pale and fluffy.
- Mix in the vanilla extract, then gently fold in the flour and fine sea salt until a soft, cohesive dough forms.
- Press exactly two thirds of this dough into the bottom of the pan. Note: Use the bottom of a flat measuring cup to get an even, level surface.
- Par bake the crust for 15 minutes until the edges are just barely starting to turn golden.
- While the crust bakes, combine 0.5 cup butter, light brown sugar, and the condensed milk in your saucepan over medium heat.
- Simmer the mixture for about 8-10 minutes, whisking constantly until the caramel thickens and turns a beautiful mahogany color.
- Pour the hot caramel over your par baked crust, spreading it all the way to the corners.
- Crumble the remaining one third of the dough over the top of the caramel layer. Note: Don't press it in; let it sit loosely on top.
- Bake for another 25-30 minutes until the topping is golden brown and the caramel is bubbling at the edges. Immediately sprinkle with the Maldon salt.
Avoiding Common Pitfalls and Baking Mistakes
The most common issue people run into with this salted caramel butter bars recipe is the texture of the caramel. If it's too soft, you likely didn't simmer it long enough on the stove. If it's rock hard, you might have overcooked it or used the wrong type of milk.
The Reason Your Caramel Is Grainy
If your caramel feels gritty on the tongue, the sugar crystals didn't dissolve properly. This usually happens if you heat the mixture too fast. Keep the heat at a steady medium and don't stop whisking. The constant motion ensures the sugar melts evenly into the fats.
The Problem with a Soggy Bottom
If the crust feels mushy, it usually means the par baking step was skipped or cut short. That first 15 minute bake is crucial because it sets the structure of the shortbread before the heavy, wet caramel is poured on top. Without it, the caramel just soaks into the raw dough.
| Problem | Root Cause | Solution |
|---|---|---|
| Caramel is too runny | Under simmered on stove | Simmer until it reaches a thick, lava like consistency. |
| Crust is too hard | Over baked or packed too tight | Press the dough firmly but don't "tamp" it down like espresso. |
| Topping sank into caramel | Added while caramel was too thin | Ensure caramel is thick enough to support the crumbles. |
Common Mistakes Checklist
- ✓ Always use a parchment sling to avoid the bars sticking to the pan.
- ✓ Never swap condensed milk for evaporated milk; they are chemically different.
- ✓ Whisk the caramel constantly to prevent the milk solids from burning on the bottom.
- ✓ Let the bars cool for at least 2 hours before slicing to allow the caramel to set.
- ✓ Sprinkle the flaky salt immediately after baking so it sticks to the surface.
Scaling Your Batch for Large Groups
If you’re making these for a big party, you can double the recipe and use a 9x13-inch pan. However, be aware that the baking times will shift. Because the surface area is larger, the caramel layer might be slightly thinner, which means it can overbake more easily.
- Scaling Down: If you only want a small treat, you can halve the recipe and use an 8x4-inch loaf pan. Reduce the par bake time by 3-5 minutes.
- Scaling Up: For a 2x batch, increase the stovetop simmer time for the caramel by about 5 minutes, as the larger volume takes longer to reach the correct temperature.
- Baking Adjustment: When doubling, lower your oven temp by 25°F and extend the final bake time by 10-15 minutes to ensure the center sets without burning the edges.
| Servings | Pan Size | Ingredient Adjustments | Total Cook Time |
|---|---|---|---|
| 8 servings | 8x4 loaf pan | 0.5x all ingredients | 40 minutes |
| 16 servings | 9x9 square | Original recipe | 45 minutes |
| 32 servings | 13x9 rectangular | 2x all ingredients | 55 minutes |
Flavor Myths and Baking Truths
One of the biggest myths in baking is that "salted" caramel needs to be salty. In reality, the salt is there to act as a flavor enhancer. It suppresses bitterness and highlights the sweet, nutty notes of the butter. If your bars taste "salty," you’ve likely overdone it or used table salt instead of flaky salt.
Another common misconception is that you need a candy thermometer to make the filling. While you can use one (look for 235°F or 113°C), visual cues are actually more reliable here. You are looking for that specific mahogany color and a texture that coats the back of a spoon thickly. If you love this type of dense, rich dessert, you might also enjoy the texture of a Southern Pecan Pie Bars recipe, which uses a similar syrup based filling.
Tasty Variations to Customize Your Caramel Bars
While the classic version is hard to beat, I love playing with the "Mix It Up" aspect of baking. If you want to add some crunch, folding 0.5 cup of toasted pecans into the caramel filling before pouring it over the crust adds a wonderful earthiness that mimics a praline.
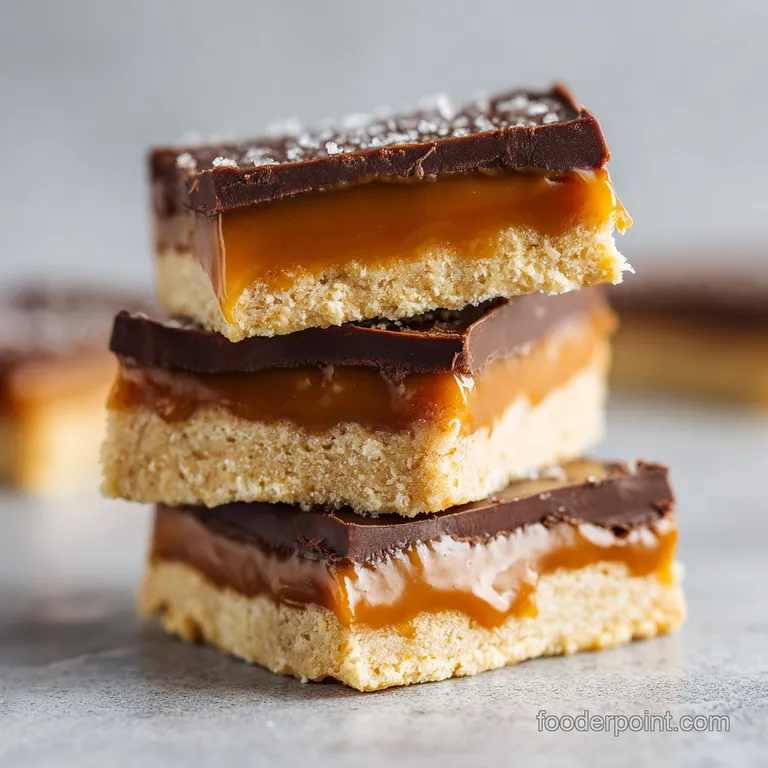
For a more decadent twist, try a "Dark Chocolate Drizzle." Once the bars are completely cool, melt some 70% dark chocolate and zigzag it across the top. The bitterness of the chocolate against the salty caramel is a total game changer.
You could even swap the vanilla extract in the crust for almond extract or a splash of bourbon to give the bars a more "grown up" flavor profile.
How to Keep Your Butter Bars Fresh
Because of the high fat and sugar content, these bars actually keep quite well. They are one of those rare desserts that might even taste better on day two once the flavors have had time to settle.
- Storage: Store in an airtight container at room temperature for up to 5 days. If your kitchen is very warm, keep them in the fridge to prevent the caramel from getting too soft.
- Freezing: These freeze beautifully! Wrap individual squares in plastic wrap and then place them in a freezer bag. They’ll stay fresh for up to 3 months.
- Zero Waste: If you have leftover shortbread crumbs that didn't make it onto the bars, toast them in a pan and use them as a topping for yogurt or ice cream. Any leftover caramel in the pot should be scraped out and stirred into your morning coffee it’s a tiny luxury you won't regret.
Creative Ways to Present Your Sweet Treats
When it comes to serving, presentation is everything. Since these bars are so rich, I like to serve them on a wooden board or a slate platter to lean into that rustic, homemade feel. If you want to get those perfectly clean, "blog worthy" slices, wipe your knife with a warm, damp cloth between every single cut.
If you are gifting these, place individual bars in small parchment paper liners (like cupcake liners but for squares). It makes them look like they came from a high end bakery and keeps the caramel from sticking to the packaging.
A final, tiny pinch of Maldon salt right before serving adds a fresh sparkle that makes the bars look as vibrant as they taste. Trust me, these are going to be the star of whatever event you bring them to. Right then, let's crack on and get that oven preheated!
Recipe FAQs
What are common salted caramel mistakes?
Failing to whisk the caramel continuously during the simmering process is the most frequent error. This lack of movement allows the milk solids to settle and burn, creating a bitter flavor and uneven texture.
What to make with salted butter caramel?
Use your leftover caramel to drizzle over ice cream or swirl into brownies. If you enjoyed mastering the sugar thickening process in this recipe, try applying those same heat management skills to our velvety homemade fudge.
Can I freeze salted caramel butter bars?
Yes, these bars freeze exceptionally well for up to three months. Wrap the cooled, sliced bars tightly in plastic wrap and store them in an airtight container to prevent freezer burn.
Can you make salted caramel with salted butter?
Yes, you can, but you must adjust your seasoning accordingly. If you use salted butter instead of the recommended unsalted variety, omit the 0.5 teaspoon of fine sea salt from the dough to keep the overall flavor profile balanced.
How to ensure the bars don't stick to the pan?
Line the 9x9-inch baking pan with parchment paper, leaving an overhang on two sides. This creates a handle or "sling" that allows you to lift the set bars out of the pan cleanly once they have finished cooling.
Is it true I can use evaporated milk instead of sweetened condensed milk?
False, this will ruin the recipe. Sweetened condensed milk contains the sugar and thick consistency necessary to form the caramel, whereas evaporated milk is too thin and lacks the required sugar content to set properly.
How to tell when the caramel filling is ready?
Watch for the mixture to thicken and darken into a deep mahogany color. You must maintain constant movement with your whisk over medium heat to reach this consistency without burning the bottom of the pan.
Salted Caramel Butter Bars

