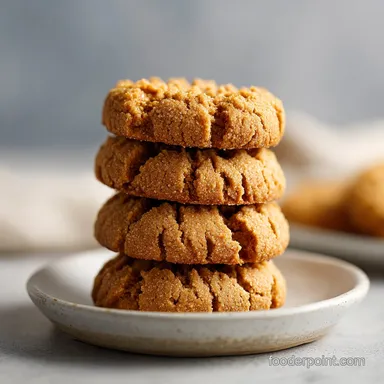
Easy Peanut Butter Cookies 3 Ingredients: Crispy Edges
- Time: Active 10 minutes, Passive 10 minutes, Total 20 minutes
- Flavor/Texture Hook: Intensely nutty with a melt on-the tongue velvety finish
- Perfect for: Busy weeknight snacks, budget-friendly lunchbox treats, or beginner bakers
- Whip Up These Easy Peanut Butter Cookies 3 Ingredients Fast
- The Magic of Minimalist Pantry Staples in One Bowl
- Essential Timing and Measurements for the Perfect Batch
- Simple Components Needed for This Flourless Cookie Recipe
- Basic Kitchen Tools for Easy One Bowl Baking Success
- Simple Stages for Shaping and Baking Your Flourless Treats
- Fixing Texture Issues for Consistently Chewy Peanut Butter Rounds
- Creative Flavor Twists to Enhance Your Three Ingredient Base
- Storing and Preserving Your Homemade Peanut Butter Treats Effectively
- Perfect Pairings to Complement Your Hearty Nutty Cookies
- Debunking Common Myths About Flourless Baking
- Recipe FAQs
- 📝 Recipe Card
Whip Up These Easy Peanut Butter Cookies 3 Ingredients Fast
The kitchen currently smells like a toasted nut factory, and honestly, I am not complaining one bit. There is something almost hypnotic about the way the scent of roasting peanuts fills a home, especially on a rainy Tuesday when the house feels a little too quiet.
I first stumbled onto this recipe years ago when I realized I was completely out of flour but had a half empty jar of creamy peanut butter staring me down. I figured, "Well, the egg has protein, the peanut butter has fat, and the sugar has the sweetness what else do we actually need?"
The result was a revelation that changed my snack game forever. I watched through the oven glass as the little balls of dough transformed into golden discs, the edges starting to sizzle just slightly as the natural oils bubbled.
When I took that first bite, the cookie didn't just crumble; it seemed to shatter into a million tiny pieces of sugary, nutty bliss before turning into a velvety smooth texture. You don't need fancy gourmet ingredients to feed a family something they will actually beg for; sometimes, the most budget friendly pantry staples do the heavy lifting best.
This recipe is the ultimate solution for those moments when you want a treat but don't want to spend an hour cleaning up flour dusted counters. We are going for maximum flavor with absolute minimum effort. It is hearty, comforting, and uses real food that you likely already have in the cupboard.
There is no hidden complexity here just a straightforward, honest cookie that hits the spot every single time.
The Magic of Minimalist Pantry Staples in One Bowl
- Protein Coagulation: The egg serves as the sole structural binder, with its proteins hardening during the bake to create a firm lattice that holds the fats in place.
- Maillard Reaction: The high sugar content reacts with the peanut proteins under heat, resulting in that deep golden brown color and a complex, toasted flavor profile.
- Emulsification Strength: As you stir, the egg yolk acts as an emulsifier, binding the natural peanut oils and the sugar into a cohesive, scoopable dough.
- Hygroscopic Properties: Sugar pulls moisture from the air and the egg, ensuring that while the edges are crispy, the center remains dense and chewy rather than dry.
| Method | Time | Texture | Best For |
|---|---|---|---|
| Standard Oven | 10 minutes | Crisp edges, soft center | Large batches for families |
| Air Fryer | 7 minutes | Extra crunchy exterior | Quick single serving cravings |
| No Bake (Chilled) | 30 minutes | Fudge like and dense | Hot summer days without heat |
While the oven is the classic route, the air fryer is a brilliant shortcut if you just want three or four cookies after dinner. The concentrated heat makes the exterior "shatter" with a satisfying crunch, though the centers stay a bit softer than the traditional bake. If you find yourself craving something even more decadent, you might want to try these alongside a No Bake Strawberry recipe for a classic PB&J inspired dessert spread.
Essential Timing and Measurements for the Perfect Batch
The beauty of this recipe lies in its simplicity, but the ratios are actually quite precise. Because we aren't using flour to soak up excess moisture, the balance between the fat in the nut butter and the moisture in the egg is vital.
If you use a jumbo egg instead of a large one, the dough might become too slick to roll.
| Component | Science Role | Pro Secret |
|---|---|---|
| Peanut Butter | Provides fat and structure | Use a brand that doesn't require stirring for the best shape |
| Granulated Sugar | Sweetens and adds crispness | Don't reduce the amount or the cookies won't hold their form |
| Large Egg | Binds the ingredients | Whisk it slightly before adding to ensure even distribution |
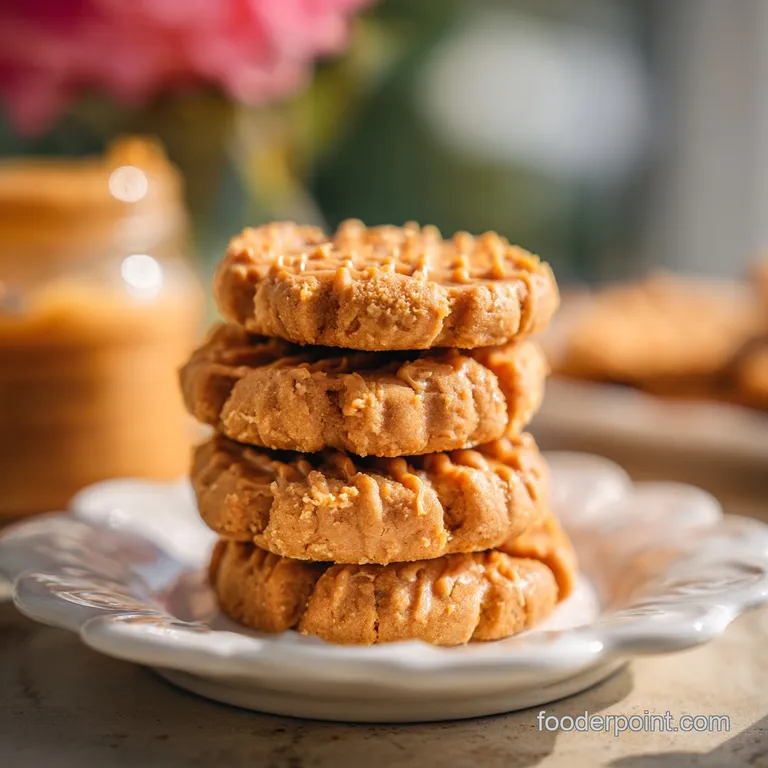
When you are looking for that perfect balance of sweetness and salt, the type of peanut butter you choose matters more than you might think. I usually reach for a standard creamy brand because it has been emulsified to stay smooth, which prevents the cookies from becoming overly oily or crumbly in the oven.
Simple Components Needed for This Flourless Cookie Recipe
- 1 cup (250g) creamy peanut butter: Why this? Provides the essential fats and solids that replace flour for a rich, nutty base.
- Substitute: Almond butter (ensure it is thick and well stirred to maintain structure).
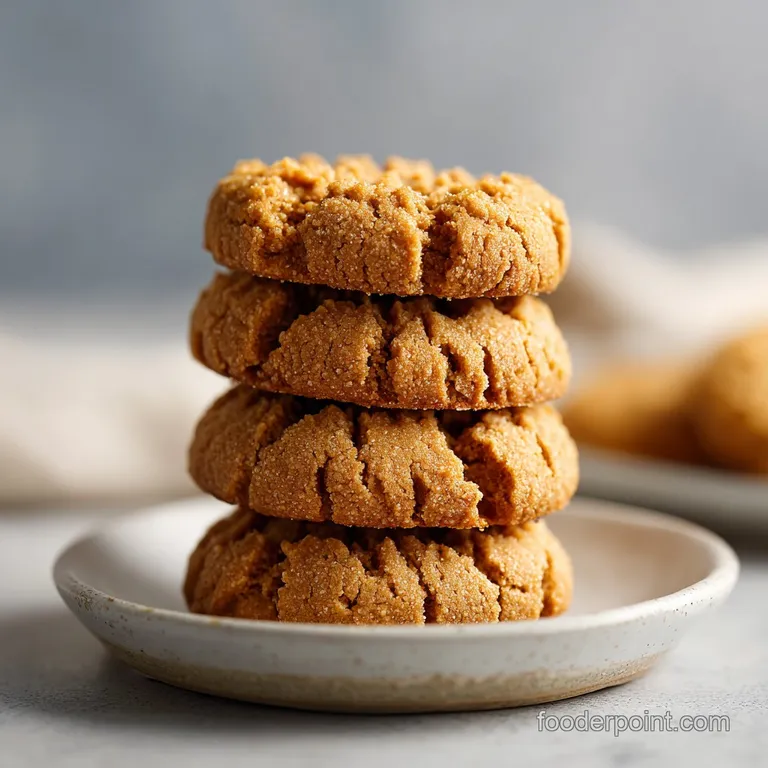
- 1 cup (200g) granulated sugar: Why this? Creates the crisp, caramelized edges and structure through crystallization during cooling.
- Substitute: Light brown sugar (results in a much chewier, almost toffee like texture).
- 1 large egg: Why this? The "glue" that prevents the cookies from turning into a puddle of oil on the pan.
- Substitute: 1/4 cup of unsweetened applesauce (note: the cookies will be significantly softer).
Chef's Tip: For a deep, sophisticated flavor that cuts through the sweetness, sprinkle a tiny pinch of flaky sea salt on top of each cookie immediately after they come out of the oven.
Basic Kitchen Tools for Easy One Bowl Baking Success
You really don't need much to get these on the table. A simple mixing bowl and a sturdy spatula are your best friends here. I've found that using a silicone baking mat or high-quality parchment paper is a total non negotiable.
Because these cookies have a high sugar and fat content, they love to stick to the pan if given half a chance.
A standard fork is also essential for creating that iconic crosshatch pattern on top. This isn't just for looks; it flattens the dough so the heat can penetrate the center of these dense little rounds evenly. If you have a cookie scoop, use it! It keeps the 18 servings uniform, which means they all finish baking at exactly the same time. This is a trick I learned from making my Chewy Chocolate Chip Cookies recipe, where even sizing is the secret to a professional looking tray.
Simple Stages for Shaping and Baking Your Flourless Treats
- Preheat your oven to 180°C and line a large baking sheet with parchment paper. Note: A hot oven is crucial for that immediate "set" when the cookies enter.
- Combine the ingredients by placing 250g of creamy peanut butter, 200g of granulated sugar, and 1 large egg in a medium bowl.
- Mix the dough using a wooden spoon or spatula until the mixture is smooth and pulls away from the sides.
- Scoop the dough into rounded tablespoons, roughly the size of a golf ball, and place them on the prepared sheet.
- Space them out leaving about 5 centimeters between each ball, as they will spread slightly during the bake.
- Create the pattern by using a fork to press a crosshatch design into the top of each ball, flattening it to about 1 centimeter thick.
- Bake the cookies for exactly 10 minutes until the edges are just starting to turn golden brown and fragrant.
- Cool on the pan for at least 5 to 10 minutes without touching them. Note: They are very fragile while hot and need this time to firm up.
- Transfer to a rack once they are stable enough to move, allowing them to cool completely for the best "shatter" texture.
Fixing Texture Issues for Consistently Chewy Peanut Butter Rounds
Cookies are Too Oily or Crumbly
Sometimes, especially with natural peanut butters where the oil separates, the dough can feel greasy. If the oil isn't fully integrated, the cookies will literally melt into a flat puddle in the oven. This usually happens because the peanut butter wasn't stirred enough or was too warm when you started.
| Problem | Root Cause | Solution |
|---|---|---|
| Extreme Spreading | Sugar was too coarse or egg was too large | Chill the dough for 15 minutes before baking to firm the fats |
| Dry/Sandy Texture | Too much sugar or overbaked | Pull them out 1 minute early; they should look "underdone" in the middle |
| Sticky Dough | High humidity or oily nut butter | Add 1 tablespoon of cornstarch to help bind the excess moisture |
The Dough is Too Sticky to Roll
If you find the dough is clinging to your palms like glue, don't panic. This often happens if your kitchen is particularly warm or if you used a very soft brand of nut butter. The solution is simple: put the whole bowl in the fridge for a few minutes.
This allows the fats to solidify just enough that you can roll neat, clean spheres.
Common Mistakes Checklist:
- ✓ Never skip the parchment paper; these cookies contain a lot of sugar and will bond to a bare metal pan.
- ✓ Avoid over mixing once the egg is incorporated, or the cookies can become unexpectedly tough.
- ✓ Do not try to move the cookies immediately after the timer goes off; they need that carryover heat to set.
- ✓ Use standard granulated sugar; liquid sweeteners like honey will completely change the chemistry and cause a mess.
Creative Flavor Twists to Enhance Your Three Ingredient Base
Even though we love the simplicity of the "big three," you can treat this recipe as a canvas. Adding 50g of dark chocolate chips transforms these into a decadent treat that tastes much more complex than it actually is. If you're a fan of texture, try using "extra crunchy" peanut butter instead of creamy.
The little bits of roasted peanut become almost like candy inside the soft dough.
For a holiday twist, I love adding a teaspoon of ground cinnamon or even a dash of vanilla extract. While these technically make it a "four or five ingredient" cookie, the spirit remains the same. If you are preparing a large brunch spread, these cookies are a fantastic hearty addition alongside a Spinach Feta Egg recipe for that perfect sweet and savory balance.
Storing and Preserving Your Homemade Peanut Butter Treats Effectively
These cookies actually taste even better on day two once the flavors have had time to settle and the texture has fully developed its chew. Keep them in an airtight container at room temperature for up to 5 days.
If you live in a very humid climate, you might notice they get a bit soft; putting a single piece of white bread in the container can help absorb that extra moisture.
For long term storage, these are absolute champions in the freezer. You can freeze the baked cookies for up to 3 months just make sure they are completely cool before you pack them away. To avoid food waste, save the crumbs at the bottom of the container!
They make an incredible topping for vanilla ice cream or can be folded into a morning bowl of oatmeal for a bit of crunch.
Perfect Pairings to Complement Your Hearty Nutty Cookies
Because these cookies are quite rich and dense, they pair beautifully with something that offers a bit of acidity or a cooling effect. A cold glass of milk is the traditional choice, but a sharp, tart apple slice is a budget friendly way to balance the heavy fats of the peanut butter.
| Servings | Peanut Butter | Sugar | Eggs |
|---|---|---|---|
| 9 Cookies | 125g (1/2 cup) | 100g (1/2 cup) | 1/2 egg (whisk and measure) |
| 18 Cookies | 250g (1 cup) | 200g (1 cup) | 1 large egg |
| 36 Cookies | 500g (2 cups) | 400g (2 cups) | 2 large eggs |
If you are scaling this recipe up for a party, remember that these cookies are quite filling. One or two per person is usually more than enough. When doubling the batch, you don't necessarily need to double the baking time, but you should definitely use two separate baking sheets.
Overcrowding the oven can lead to uneven airflow, which might leave the cookies in the center of the tray a bit pale and soft.
Debunking Common Myths About Flourless Baking
One of the biggest misconceptions is that you need flour to create a "real" cookie. Many people assume these will just be blobs of warm peanut butter, but the science of the egg protein proved that wrong.
Once the egg reaches about 70°C in the oven, it begins to solidify, creating a structure that is remarkably similar to a traditional shortbread.
Another myth is that you can't use "natural" peanut butter (the kind with just peanuts and salt). While it is more challenging because of the oil separation, it is entirely possible if you pour off the excess oil at the top of the jar first.
The resulting cookie might be a bit more fragile and "short" in texture, but the flavor will be incredibly intense and pure.
Right then, you've got the tricks, the science, and the plan. These easy peanut butter cookies 3 ingredients are about to become your new favorite emergency snack. They are budget friendly, take almost no time, and satisfy that deep craving for something hearty and sweet.
Trust me, once you see how they shatter and then melt in your mouth, you'll never look at a jar of peanut butter the same way again. Happy baking!
Recipe FAQs
What are the three ingredients in peanut butter cookies?
Peanut butter, granulated sugar, and one large egg. These three components provide all the necessary fat, structure, and sweetness needed for the classic cookie.
What are the basic ingredients for peanut butter cookies?
Creamy peanut butter, granulated sugar, and a large egg. This minimal ratio relies on the natural oils and proteins in the peanut butter to hold the cookie together without any flour or leavening agents.
Why are my 3-ingredient peanut butter cookies falling apart?
No, they should hold their shape if baked correctly. The most common cause is using natural peanut butter that wasn't stirred well enough, leading to excess oil separating during the bake.
What to bake with three ingredients?
These peanut butter cookies are a prime example of a simple 3-ingredient bake. You can also make simple fudge or quick candies using similar high fat, high sugar bases.
Can I substitute the egg in this 3-ingredient recipe?
Technically yes, but it drastically changes the texture. Substitutions like applesauce or flax egg will work, but the cookie loses its signature dense, slightly crisp structure and becomes much softer.
How to get the traditional crosshatch pattern on the dough?
Press the dough balls gently with the tines of a fork twice, rotating 90 degrees for the second press. This flattens the dense dough so the center cooks evenly; this technique is similar to how you ensure even cooking in a large roast, like our Sheet Pan Chicken recipe.
Should I chill the dough before baking these simple cookies?
Yes, chilling the dough for 15 minutes is highly recommended. Since this dough is high in fat and lacks flour stabilizer, a quick chill solidifies the peanut butter, preventing excessive spreading while baking.
3 Ingredient Peanut Butter Cookies