Fudgy Brownies from Scratch Recipe
- Time: Active 15 minutes, Passive 25 minutes, Total 40 minutes
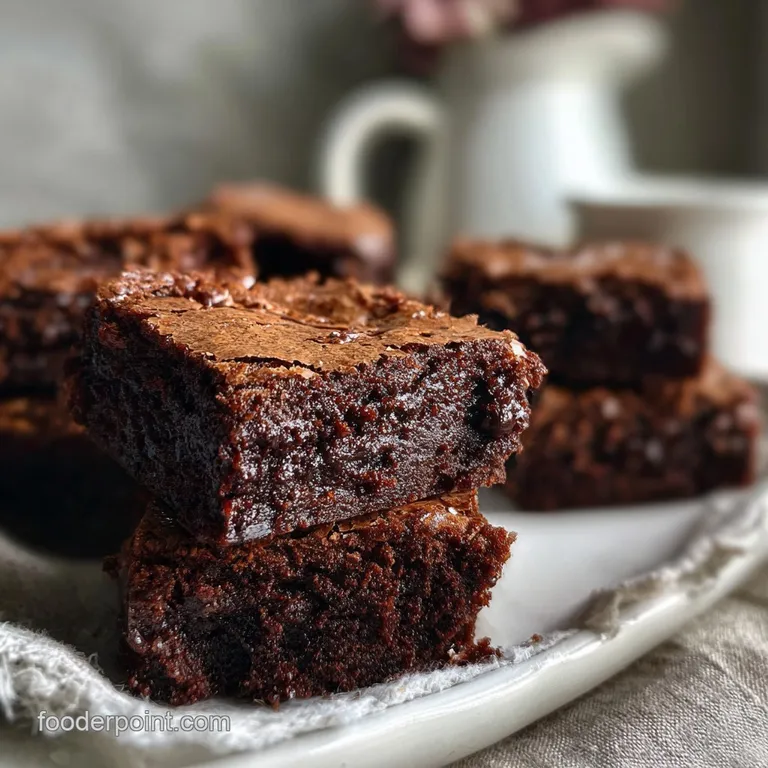
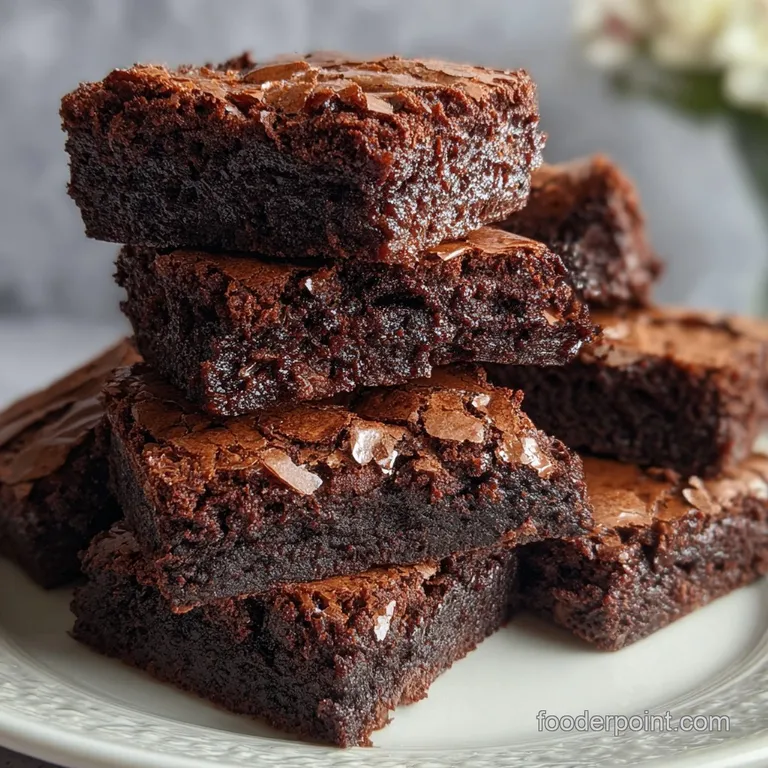
- Flavor/Texture Hook: Velvety dark chocolate with a shatter thin crackly top
- Perfect for: Late night cravings or showing off at a potluck
- Achieving the Ultimate Gooey Texture in These Fudgy Brownies
- The Secret to Success for Perfect Chocolate Treats
- Quick Performance Metrics for Your Baking Schedule
- Component Analysis and Ingredient Deep Dive
- Essential Tools for Chocolate Success
- Elements Required for Brownies From Scratch
- Step-by-Step Instructions for Decadent Results
- Troubleshooting Common Baking Problems
- Adjusting the Recipe for Different Needs
- Debunking Common Kitchen Myths
- Preservation Secrets and Zero Waste Tips
- Creative Serving Suggestions for Your Masterpiece
- Recipe FAQs
- 📝 Recipe Card
Achieving the Ultimate Gooey Texture in These Fudgy Brownies
The moment you pull these from the oven, your kitchen will fill with the scent of toasted cocoa and warm vanilla. It is a heavy, intoxicating aroma that practically hugs you. I remember the first time I nailed this recipe; I spent years settling for "cakey" brownies that felt like sad pieces of chocolate bread.
Then, I realized that the secret wasn't more flour it was less. When you bite into these, you get that distinct "shatter" from the paper thin crust, followed immediately by a center so rich it's almost like a ganache.
We’ve all been there, staring at a box mix because it feels safer. But honestly, making fudgy brownies from scratch is just as fast and the payoff is incomparable. There is no chemical aftertaste here, just the deep, resonant punch of 70% dark chocolate and Dutch processed cocoa.
We are going for a texture that is dense, moist, and unashamedly indulgent. Right then, let’s get into why this specific method works every single time.
This isn't just about mixing ingredients in a bowl; it’s about the order of operations. We are looking for that specific "glossy" finish that looks like a frozen lake of chocolate. It’s a bit of a kitchen miracle when the sugar and eggs emulsify just right.
If you’ve ever wondered why some brownies look dull and others look like they belong in a bakery window, you’re about to find out.
The Secret to Success for Perfect Chocolate Treats
Before we even crack an egg, we need to talk about the "why." Most people over whisk their flour, which develops gluten and turns a brownie into a cake. We want to avoid that at all costs. By focusing on the fat and the sugars first, we create a stable base that doesn't need much structural help from the flour. If you’re on a baking roll and want to keep the oven hot, you might also love my Chewy Chocolate Chip Cookies recipe for a different kind of sweet treat.
The Physics of the Fudgy Center
Density Control: Keeping the flour content low prevents the formation of a crumb structure, resulting in a fudgy rather than airy interior. This ensures the fats remain the dominant texture setter.
Chef's Tip
The Espresso Secret: Even if you aren't a coffee fan, add that teaspoon of espresso powder. It doesn't make the brownies taste like coffee; it acts as a flavor amplifier that makes the chocolate taste "darker" and more complex.
Bloom the Cocoa: Adding your cocoa powder to the hot melted butter and chocolate mixture "blooms" it, releasing oil soluble flavor compounds that stay dormant in dry powder.
| Factor | Scratch made Brownies | Box Mix Shortcut | Resulting Trade off |
|---|---|---|---|
| Fat Source | 115g Real Butter | Vegetable Oil | Butter adds a nutty, rich depth that oil lacks |
| Chocolate | 70% Dark + Cocoa | Cocoa Powder Only | Real chocolate provides a velvety, melting mouthfeel |
| Sweetness | Controlled sugar ratio | Pre set (often very high) | Scratch made allows for a balanced, bittersweet profile |
Choosing between fresh and a shortcut often comes down to the texture of the fat. While oil based brownies stay soft longer, butter based brownies from scratch have a much more sophisticated flavor profile that lingers on the palate.
Quick Performance Metrics for Your Baking Schedule
Knowing how long things take helps you plan your dessert attack. These fudgy brownies from scratch are surprisingly fast, but the cooling time is where the magic happens.
Don't be tempted to slice them while they are steaming, or you'll end up with a pile of chocolate mush instead of clean, sharp squares.
| Servings | Pan Size | Doneness Cue | Cool Time |
|---|---|---|---|
| 16 squares | 20x20 cm square | Slight wobble in center | 1 hour minimum |
| 8 large bars | 20x20 cm square | Toothpick with moist crumbs | 1 hour 30 mins |
| 24 bite sized | 23x33 cm (thinner) | Firm edges, set center | 45 minutes |
Giving the brownies time to rest allows the starches to fully set and the fats to firm up. This is the difference between a brownie that crumbles and one that has that perfect, toothsome bite.
Component Analysis and Ingredient Deep Dive
Every ingredient in this list has a specific job. We aren't just adding things for the sake of it. For example, the mix of granulated and brown sugar isn't just for sweetness it's for structural integrity and moisture.
| Ingredient | Science Role | Pro Secret |
|---|---|---|
| 70% Dark Chocolate | Provides fat and structure | Use high-quality bars, not chips, for a better melt |
| Dutch Processed Cocoa | Adds deep color and neutral acidity | Sift it to avoid stubborn lumps in the batter |
| Large Eggs | Acts as the primary emulsifier | Use room temperature eggs to prevent the butter from seizing |
| Light Brown Sugar | Increases chewiness via molasses | Pack it tightly when measuring for consistent moisture |
The interaction between the sugars and the eggs is what creates that coveted crackly top. When you whisk them together vigorously, you’re creating a thin layer of meringue that rises to the surface during baking.
Essential Tools for Chocolate Success
You don't need a professional kitchen to make world class fudgy brownies from scratch recipe. However, a few specific tools will make the process much smoother and ensure your measurements are precise.
- Digital Kitchen Scale: Baking is a science; weighing your flour (65g) and butter (115g) is much more accurate than using cups.
- 20cm Square Baking Pan: This size provides the perfect thickness for 16 servings.
- Parchment Paper: Leave an "overhang" on the sides to lift the brownies out easily.
- Whisk and Silicone Spatula: Use the whisk for the eggs/sugar and the spatula for folding in the flour.
- Heat proof Bowl: For melting the chocolate and butter over a simmering pot (bain marie).
Having your equipment ready prevents you from over mixing the batter while you hunt for a spatula. It keeps the workflow moving so the chocolate stays at the right temperature for the eggs.
Elements Required for Brownies From Scratch
This list is curated for maximum impact. Each component works in harmony to build layers of chocolate flavor.
- 115g Unsalted Butter: Provides the rich, creamy base. Why this? Salted butter varies in salt content; unsalted allows for total control.
- Substitute: Virgin coconut oil (115g) for a subtle tropical note.
- 100g 70% Dark Chocolate: Chopped finely for even melting. Why this? High cocoa solids ensure a deep flavor without being cloyingly sweet.
- Substitute: Semi sweet chocolate (100g), but reduce granulated sugar by 20g.
- 30g Dutch processed Cocoa Powder: For that classic dark look. Why this? It's treated with alkali to reduce bitterness and darken the color.
- Substitute: Natural cocoa powder, though the color will be lighter and the taste tangier.
- 150g Granulated Sugar: Creates the crisp top. Why this? Essential for the meringue like surface.
- Substitute: Caster sugar for even faster dissolving.
- 50g Light Brown Sugar: For moisture and chew. Why this? The molasses content keeps the center soft for days.
- Substitute: Dark brown sugar for a more intense caramel flavor.
- 2 Large Eggs: The glue of the recipe. Why this? Provides the protein needed to hold the fudgy mass together.
- Substitute: 1/2 cup unsweetened applesauce (note: result will be much denser/moister).
- 1 tbsp Vanilla Extract: To round out the cocoa. Why this? Vanilla actually heightens the perception of chocolate sweetness.
- Substitute: 1 tsp vanilla bean paste for visible specks.
- 65g All purpose Flour: Just enough for structure. Why this? Keeping flour low is the key to the "fudgy" designation.
- Substitute: 1:1 gluten-free flour blend with xanthan gum.
- 0.5 tsp Fine Sea Salt: To balance the sugar. Why this? Salt cuts through the richness and makes the flavors pop.
- Substitute: Kosher salt (use 1 tsp).
- 1 tsp Espresso Powder: The secret weapon. Why this? Intensifies the chocolate without adding coffee flavor.
- Substitute: Very finely ground instant coffee.
Step-by-step Instructions for Decadent Results
- Prep the oven. Heat your oven to 175°C and line a 20cm square pan with parchment paper. Note: Using a "sling" of parchment allows for easy removal later.
- Melt the foundation. Combine 115g butter and 100g chopped dark chocolate in a heat proof bowl over simmering water until smooth and glossy.
- Bloom the cocoa. Stir in 30g cocoa powder and 1 tsp espresso powder into the warm chocolate mixture. Note: The heat wakes up the cocoa's aroma.
- Whisk the sugars. In a separate large bowl, whisk 150g granulated sugar, 50g light brown sugar, and 2 eggs until the mixture is pale and doubled in volume.
- Emulsify the base. Slowly pour the chocolate butter mixture into the egg mixture while whisking constantly. Note: This prevents the eggs from scrambling.
- Add the aromatics. Stir in 1 tbsp vanilla extract and 0.5 tsp fine sea salt.
- Fold the dry ingredients. Sift in 65g all purpose flour and fold gently with a spatula until no white streaks remain. Note: Do not over mix here; stop as soon as it's combined.
- Bake the batter. Pour into the prepared pan and bake for 25 minutes until the edges are set but the center slightly wobbles.
- The Scent Check. At the 20 minute mark, your kitchen should smell like a chocolate factory. If it smells like toasted nuts, check the oven immediately!
- Cool completely. Let the brownies sit in the pan for at least 1 hour before lifting them out. The center will firm up as it cools.
Troubleshooting Common Baking Problems
Even with the best fudgy brownies from scratch, things can go sideways. The most common issue is usually related to oven temperature or over mixing. If your brownies look like cake, you probably incorporated too much air or used too much flour.
Mastering the Baking Time
If you overbake these by even 5 minutes, they transition from fudgy to dry. Every oven is different, so start checking at 22 minutes. The "toothpick test" for fudgy brownies should come out with a few moist, sticky crumbs attached not clean, and definitely not with liquid batter.
Fixing the "Cakey" Texture
This usually happens if you beat the flour into the batter. Once the flour hits the wet ingredients, switch to a spatula. You want to fold, not stir. Also, ensure you aren't substituting too much flour into the mix.
Preventing a Dull Surface
The shiny, crackly top is the result of dissolved sugar. If your top is dull, try whisking the eggs and sugar for an extra minute before adding the chocolate. This ensures the sugar crystals are broken down and ready to form that meringue layer.
| Problem | Root Cause | Solution |
|---|---|---|
| Greasy bottom | Butter was too hot or separated | Let melted chocolate cool for 5 mins before adding eggs |
| Hard, brittle edges | Oven temperature too high | Use an oven thermometer to verify 175°C |
| Brownies won't set | Underbaked or too much fat | Bake for 5 more mins; check pan size (too small = too thick) |
Common Mistakes Checklist
- ✓ Stop whisking the moment the flour disappears to prevent gluten formation.
- ✓ Use room temperature eggs so they emulsify properly with the fats.
- ✓ Never skip the parchment paper, or the fudgy bottom will stick to the pan.
- ✓ Avoid using a glass pan if possible; metal conducts heat more evenly for brownies.
- ✓ Trust the timer they look underdone when hot, but they firm up significantly.
Adjusting the Recipe for Different Needs
If you want to scale this recipe, keep in mind that brownies are sensitive to depth. Doubling the recipe in the same 20cm pan will result in massive, undercooked bars.
- Scaling Down (8 servings): Use a small loaf pan. Reduce baking time to 20 minutes. For the "half egg," whisk one egg and measure out 25g.
- Scaling Up (32 servings): Double all ingredients but use a 23x33 cm pan. Increase baking time to 30-35 minutes.
- Baking (2x): If you use a larger pan, the brownies will be thinner. Lower the temp by 10°C to ensure the edges don't burn before the center sets.
| Goal | Adjustment | Effect on Outcome |
|---|---|---|
| Chewier Texture | Add an extra egg yolk | Adds fat and lecithin for a "bendier" brownie |
| More Height | Add 1/4 tsp baking powder | Note: This will make them slightly more "cakey" |
| Thicker Bars | Use a smaller pan (15x15 cm) | Increase bake time by 10 mins; very dense result |
Debunking Common Kitchen Myths
One big myth is that you need "special" expensive chocolate to make homemade fudgy brownies from scratch. While quality matters, a standard grocery store dark chocolate bar works beautifully. You don't need $20 artisanal cocoa.
Another misconception is that you should "overbeat" the batter for a better rise. In the world of fudgy brownie recipe creation, air is the enemy. We want a dense, heavy slab, not a chocolate sponge. If you want air, bake a chocolate cake!
Preservation Secrets and Zero Waste Tips
Storing your chewy fudgy brownies from scratch correctly ensures they stay moist for days. Actually, some people argue they are better on day two when the flavors have fully married.
- Storage: Keep in an airtight container at room temperature for up to 4 days. In the fridge, they will last 1 week but will become very firm (almost like a fudge block).
- Freezing: Wrap individual squares in plastic wrap, then place in a freezer bag. They stay fresh for 3 months. Thaw at room temperature for 30 minutes.
- Reheating: 10 seconds in the microwave is all you need to bring back that "just baked" gooeyness.
- Zero Waste: If you end up with dry edges or overbaked crumbs, don't toss them! Pulse them in a blender to make "brownie soil" for ice cream toppings, or fold them into a batch of vanilla cheesecake batter.
Creative Serving Suggestions for Your Masterpiece
While these are incredible on their own, a few tweaks can turn them into a restaurant quality dessert.
- The Classic: Serve warm with a scoop of high-quality vanilla bean ice cream. The cold cream melting into the warm chocolate is heaven.
- The Sea Salt Finish: Sprinkle a few flakes of Maldon sea salt over the top right as they come out of the oven.
- The Nutty Crunch: Fold in 50g of toasted walnuts or pecans during the flour stage for a textural contrast.
- The Adult Version: Serve with a glass of cold milk or a sharp espresso to cut through the richness.
Making easy fudgy brownies from scratch is a skill that will serve you forever. Once you see how much better these are than the boxed stuff, there is no going back. Happy baking!
Recipe FAQs
What's the secret to super fudgy brownies?
A high fat-to-flour ratio and skipping aeration. Melt the butter and chocolate together rather than creaming fat and sugar; this keeps the structure dense and truffle like instead of cakey.
How to make perfect fudgy brownies?
Whisk eggs and sugar vigorously until pale and doubled in volume. This crucial step creates the glossy, crackly top by forming a thin meringue layer on the surface.
What makes brownies chewy vs fudgy?
Chewy brownies use more brown sugar and often an extra egg yolk, while fudgy ones prioritize melted fat and lower flour content. Chewy results from higher moisture retention via molasses in brown sugar.
What is the secret to a chewy brownie?
Use light brown sugar over granulated sugar for moisture retention. The molasses in brown sugar keeps the final product softer and more pliable as it cools.
How to avoid dry, cakey brownies?
Fold the flour in gently and stop mixing immediately once streaks disappear. Overmixing develops gluten, which builds the airy structure associated with cake, not density.
Is it true I should add espresso powder to enhance chocolate flavor?
Yes, adding espresso powder is highly recommended. It acts as a flavor amplifier, making the dark chocolate taste deeper and more complex without imparting a coffee taste.
How long should I cool the brownies before slicing?
Cool for a minimum of one hour at room temperature. Slicing too early results in gooey collapse; cooling allows the fats to set, ensuring clean, defined squares.
Fudgy Brownies From Scratch

