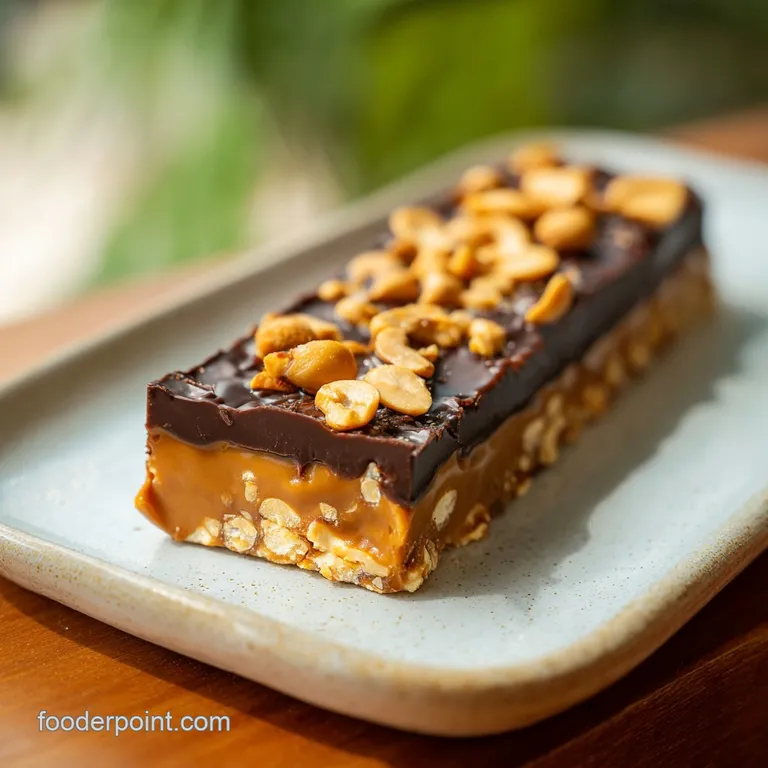
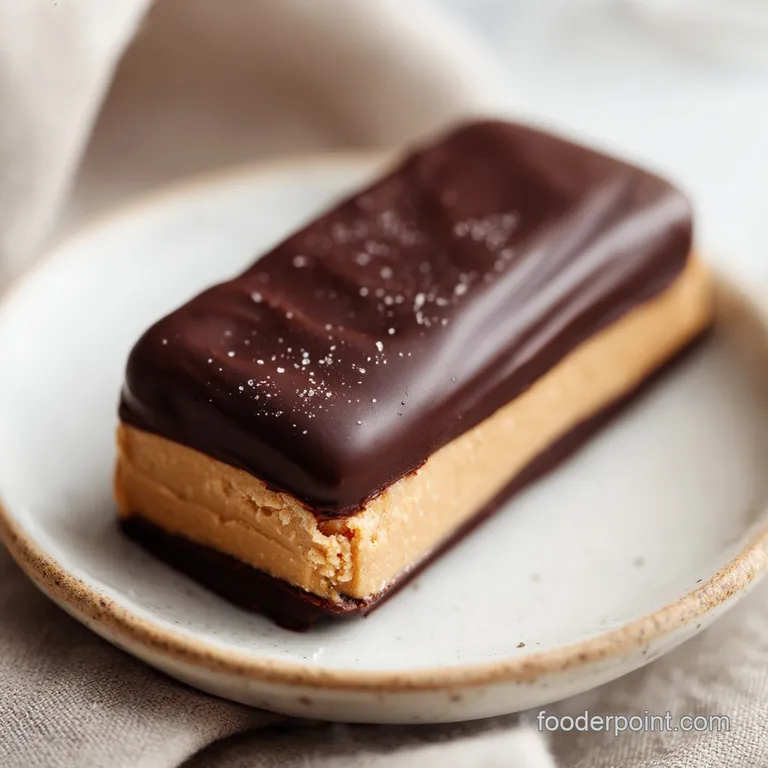
No Bake Chocolate Peanut Butter Bars
- Time: Active 15 minutes, Passive 1 hour 45 mins, Total 2 hours
- Flavor/Texture Hook: Fudgy peanut base with a crisp chocolate snap
- Perfect for: Afternoon cravings, meal prep snacks, or summer entertaining
- The Science Behind Fudgy Textures
- Ingredient Deep Dive Analysis
- Pantry Essentials for Vibrant Flavors
- Tools for a Smooth Process
- Layering Flavors Step by Step
- Common Texture and Setting Issues
- Clever Swaps for New Varieties
- Freshness and Longevity Guidelines
- Presentation and Serving Ideas
- Recipe FAQs
- 📝 Recipe Card
The first time I attempted a version of these, the kitchen smelled like a dream but the bars were a total puddle. I remember standing over my counter at 10:00 PM, trying to salvage a batch that was far too oily because I had used a brand of peanut butter that just didn't want to play nice with my syrup.
It was a sticky lesson in chemistry, but it sparked a passion in me to find the exact ratio that creates that legendary, dense bite we all crave.
Now, every time I press this mixture into the pan, I get that same rush of excitement. There is something so satisfying about watching the dark chocolate melt into a glossy pool, knowing it is about to meet a salty, nutty base.
When you finally pull the tray from the fridge and hear that first "crack" of the chocolate layer as the knife goes through, you'll know exactly why I’m so obsessed with this recipe. It’s not just a snack, it’s a tiny moment of pure, sweet joy.
The Science Behind Fudgy Textures
Creating the perfect no bake chocolate peanut butter bars requires a bit of understanding regarding how fats and sugars interact at room temperature. Because we aren't using heat to set a crumb, we rely on cooling and structural binders to keep everything together.
- Lipid Stabilization: The natural fats in the peanut butter want to remain fluid, but when mixed with the fibrous structure of almond flour, they create a stable matrix.
- Hygroscopic Balancing: Maple syrup acts as a humectant, drawing in just enough moisture to keep the base from becoming a dry, sandy mess.
- Phase Transition: Coconut oil in the topping lowers the melting point of the dark chocolate, ensuring it remains soft enough to bite without the whole bar shattering.
| Servings | Ingredient Adjustments | Pan Size | Chill Time |
|---|---|---|---|
| 8 People | 125g PB, 75g Almond Flour | 9x5 Loaf Pan | 1 hour 30 mins |
| 16 People | 250g PB, 150g Almond Flour | 8x8 Square Pan | 1 hour 45 mins |
| 32 People | 500g PB, 300g Almond Flour | 9x13 Rectangular | 2 hours 30 mins |
When you are deciding which pan to use, remember that a smaller pan results in a thicker, more decadent bar. If you prefer a higher chocolate to peanut butter ratio, spreading the mixture into a larger pan will give you a thinner base.
This adjustment changes the sensory experience, moving from a heavy fudge feel to something more akin to a chocolate bark with a nutty underlayer.
Ingredient Deep Dive Analysis
Success in the kitchen starts with understanding your elements. For this recipe, the quality of your peanut butter and the grind of your almond flour will dictate whether your bars are silky or gritty.
| Ingredient | Science Role | Pro Secret |
|---|---|---|
| Natural Peanut Butter | Primary Fat/Protein | Stir thoroughly to incorporate all separated oils before measuring. |
| Almond Flour | Structural Binder | Use super fine blanched flour to avoid a grainy, sandy texture. |
| Dark Chocolate Chips | Solidification Agent | Choose 70% cocoa for a rich contrast against the sweet syrup. |
I always tell my friends that the almond flour is the secret hero here. While some versions use graham cracker crumbs, almond flour adds a subtle nuttiness and a much more velvety mouthfeel. It also keeps the bars from feeling overly sugary, which is a mistake I made for years. If you find yourself enjoying the texture of these, you might also love the crumbly satisfaction of a Peanut Butter Cookies recipe for those days when you actually want to turn the oven on.
Pantry Essentials for Vibrant Flavors
To make these bars truly stand out, we use specific ingredients that build layers of flavor.
- 1 cup (250g) natural creamy peanut butter: Why this? Provides the essential fatty base and deep roasted nut flavor.
- 1/3 cup (80ml) pure maple syrup: Why this? Adds floral sweetness without the grit of granulated sugar.
- 1.5 cups (150g) super fine almond flour: Why this? Acts as the gluten-free "flour" that provides structure and chew.
- 1 tsp pure vanilla extract: Why this? Enhances the chocolate and peanut notes with aromatic warmth.
- 0.25 tsp fine sea salt: Why this? Sharpens the sweetness and balances the richness of the fats.
- 1 cup (170g) dark chocolate chips (70% cocoa): Why this? Creates a sophisticated, slightly bitter snap on top.
- 1 tbsp (15g) virgin coconut oil: Why this? Prevents the chocolate from becoming too brittle to slice.
- 1 tbsp creamy peanut butter: Why this? Used for the aesthetic and flavorful top swirl.
- 0.5 tsp flaky sea salt: Why this? Adds a crunchy texture and a final pop of seasoning.
| Original Ingredient | Substitute | Why It Works |
|---|---|---|
| Maple Syrup | Agave Nectar | Similar viscosity. Note: Agave is sweeter, so use 10% less. |
| Almond Flour | Oat Flour | High fiber content. Note: Results in a denser, slightly more chewy bar. |
| Coconut Oil | Salted Butter | Adds milk solids. Note: Adds a savory, rich note to the chocolate. |
Using oat flour is a fantastic swap if you have a nut allergy in the house, but keep in mind that oat flour absorbs more moisture. If the mixture looks too dry after adding the oats, a tiny splash of extra syrup or even a teaspoon of water can bring back that pliable, fudge like consistency we are looking for.
Tools for a Smooth Process
You don't need a high tech kitchen to master these no bake chocolate peanut butter bars, but a few specific tools make the experience much more enjoyable.
First, a sturdy silicone spatula is your best friend. The mixture is quite thick and sticky, and a regular spoon often leaves half the goodness stuck to the bowl. You will also want an 8x8-inch square baking pan. I highly recommend lining it with parchment paper, leaving a bit of an "overhang" on the sides.
This creates a sling that allows you to lift the entire block of bars out once they are set, making the slicing process much cleaner.
A heat proof glass bowl is essential for melting your chocolate. Whether you use a microwave or a double boiler method, glass provides more even heat distribution than plastic. Finally, a sharp chef's knife is non negotiable.
To get those clean, professional looking edges, you'll want to run the knife under hot water and wipe it dry before every single cut.
Layering Flavors step by step
Let’s get into the actual making of these treats. Follow these steps closely, and you'll have a tray of gourmet style bars in no time.
- Line your pan. Place parchment paper in an 8x8-inch pan, ensuring the sides are covered. Note: This prevents the base from sticking to the metal corners.
- Combine the wet base. Mix 250g peanut butter, 80ml maple syrup, 1 tsp vanilla, and 0.25 tsp fine sea salt in a large bowl. Note: Stir until the mixture is glossy and completely uniform.
- Incorporate the flour. Gradually fold in 150g almond flour. Cook until the dough pulls away from the sides of the bowl.
- Press the foundation. Transfer the mixture to your pan and press down firmly. Note: Use the bottom of a flat measuring cup to get a perfectly level surface.
- Prepare the topping. Combine 170g chocolate chips and 15g coconut oil in a bowl. Note: Heat in 30 second bursts in the microwave, stirring between each.
- Smooth the chocolate. Pour the melted chocolate over the peanut butter base. Gently tilt the pan to ensure the chocolate reaches every corner.
- Create the swirl. Drop small dollops of the extra tablespoon of peanut butter onto the wet chocolate and use a toothpick to swirl them.
- Add the crunch. Sprinkle 0.5 tsp flaky sea salt over the top while the chocolate is still wet.
- Set the bars. Place the pan in the refrigerator for at least 1 hour 45 mins until the chocolate is firm to the touch.
- Slice and serve. Lift the parchment sling out, place on a cutting board, and slice into 16 squares.
Chef's Tip: If your natural peanut butter is very cold from the fridge, microwave it for 15 seconds before mixing. This loosens the oils and makes it much easier to incorporate the almond flour without creating lumps.
| Method | Time | Texture | Best For |
|---|---|---|---|
| Microwave Melting | 2 mins | Silky / Glossy | Quick assembly and ease |
| Double Boiler | 8 mins | Very Stable | Preventing chocolate burn |
| Cold Press Only | 0 mins | Matte / Firm | If skipping the chocolate top |
While the microwave is faster, the double boiler method (placing a bowl over a pot of simmering water) gives you much more control. If you are using very high-quality dark chocolate, the double boiler prevents the cocoa solids from seizing, which can happen if the microwave creates "hot spots" in the bowl.
Common Texture and Setting Issues
Even with a simple recipe, things can occasionally go sideways. The most common hurdle is the texture of the base it’s either too crumbly or too soft.
Base is Too Crumbly
If your bars fall apart the moment you touch them, the ratio of dry to wet ingredients is off. This often happens if the almond flour was packed too tightly into the measuring cup.
To fix this, you can crumble the mixture back into a bowl and add a tablespoon of melted coconut oil or extra peanut butter to act as a glue.
Chocolate Seizing or Grainy
If your chocolate topping looks dull or feels gritty, a drop of water might have accidentally splashed into the bowl while melting. Chocolate is extremely sensitive to moisture during the melting phase. The fix is to add a teaspoon of coconut oil and stir vigorously, though it may never regain its original gloss.
| Problem | Root Cause | Solution |
|---|---|---|
| Oily Surface | PB wasn't stirred | Blot with paper towel; chill for an extra hour. |
| Bottom is Soft | Not enough flour | Freeze for 20 mins before slicing to firm the base. |
| Cracking Topping | Chocolate too cold | Let bars sit at room temp for 5 mins before cutting. |
Common Mistakes Checklist:
- ✓ Stir your natural peanut butter all the way to the bottom of the jar to mix the solids and oils.
- ✓ Use super fine blanched almond flour, not coarse almond meal, for the best fudge texture.
- ✓ Don't skip the coconut oil in the chocolate; it provides the "give" needed for a clean slice.
- ✓ Wipe your knife clean between every cut to prevent peanut butter streaks on the dark chocolate.
- ✓ Be patient with the chilling time; cutting too early will result in a messy, sloping edge.
Clever Swaps for New Varieties
Once you have mastered the standard no bake chocolate peanut butter bars, it is time to have some fun with the flavors. My passion for these treats comes from how easily they adapt to whatever is in my pantry.
For an Energizing Espresso Kick
Add 1 teaspoon of instant espresso powder to the melted chocolate layer. This doesn't make the bars taste like coffee, but it significantly deepens the profile of the dark chocolate, making it taste more intense and sophisticated.
For a Crunchy Texture Contrast
Fold in 1/4 cup of chopped roasted peanuts or cacao nibs into the base before pressing it into the pan. This breaks up the smooth fudge texture with a satisfying "snap" that mimics a classic candy bar. If you love a good crunch, you might also find a similar joy in making a Banana Walnut Muffins recipe where the nuts provide that perfect contrast to a soft interior.
To Make it Keto Friendly
Substitute the maple syrup for a monk fruit based liquid sweetener and ensure your chocolate chips are sugar-free (like Lily's brand). Almond flour is already naturally low carb, so these bars are actually very easy to fit into a ketogenic lifestyle without sacrificing that vibrant flavor.
Freshness and Longevity Guidelines
Because these bars contain natural oils and no preservatives, how you store them is key to maintaining that perfect texture.
Keep the bars in an airtight container in the refrigerator for up to 7 days. If you leave them on the counter for too long, especially in a warm kitchen, the peanut butter base will soften and the bars will lose their structural integrity. They won't spoil quickly, but they certainly won't have that satisfying "bite."
For long term storage, these bars freeze beautifully for up to 3 months. I like to wrap individual squares in parchment paper and place them in a freezer bag. You can actually eat them straight from the freezer for a very firm, truffle like experience, or let them thaw in the fridge for 20 minutes.
This is a great zero waste tip: if you have a few small "end pieces" left over from slicing, crumble them up and store them in a jar in the freezer. They make an incredible topping for vanilla bean ice cream or a morning smoothie bowl!
Presentation and Serving Ideas
When it comes to serving these no bake chocolate peanut butter bars, presentation is everything. Since they are so rich, I usually cut them into smaller 2 inch squares.
If you're hosting a gathering, try serving them on a chilled marble slab. This not only looks beautiful but helps keep the bars firm while they sit out. You can also pair them with fresh raspberries or sliced strawberries.
The tartness of the fruit cuts through the heavy fat of the peanut butter and chocolate, creating a very balanced dessert plate.
If you're looking for another no bake option to serve alongside these, a No Bake Strawberry recipe provides a wonderful light and creamy contrast to the dense, nutty bars. I’ve found that offering both a chocolate based and a fruit based no bake dessert is always a hit at summer potlucks.
For a Stable, Non Greasy Base
The secret to a base that doesn't feel oily on your fingers is the "rest" period. After mixing the almond flour into the peanut butter, let the dough sit in the bowl for 2 minutes before pressing it into the pan.
This allows the almond flour to fully hydrate and soak up the excess oils from the peanuts.
For a Clean Cut Without Shattering
Many people struggle with the chocolate top cracking into shards when they try to slice the bars. To avoid this, always add that tablespoon of coconut oil to the chocolate. It changes the crystalline structure of the cocoa butter, making it slightly more flexible even when cold.
Also, remember the hot knife trick it's the difference between a jagged mess and a professional finish.
For Enhanced Flavor Perception
Temperature matters! While these must be stored in the fridge, let them sit at room temperature for about 5 to 10 minutes before you actually eat them. Cold temperatures mute our taste buds.
By letting the bars warm up slightly, the cocoa butter and peanut oils begin to melt on your tongue instantly, releasing the full spectrum of the salty sweet flavors.
Recipe FAQs
Can I substitute almond flour with regular all-purpose flour?
No, this changes the texture significantly. All-purpose flour requires baking to develop structure, whereas almond flour provides the dense, fudgy binder necessary for a no-bake bar.
How to achieve a clean cut when slicing the bars?
Heat the knife under hot water and wipe it dry between every slice. This simple trick prevents the peanut butter base from sticking and the chocolate top from cracking or dragging.
How long must these bars chill before they are firm enough to eat?
Chill for a minimum of 1 hour 45 minutes in the refrigerator. While the base sets faster, the chocolate topping needs this time to fully crystallize and achieve that satisfying snap.
Is it true I must use natural, unstirred peanut butter for this recipe?
No, this is a common misconception. You must thoroughly stir natural peanut butter to incorporate the separated oils; otherwise, the base will be too oily.
What is the best way to melt the chocolate topping without burning it?
Microwave at 50% power in 20-second intervals, stirring well between each. This gradual heat prevents scorching the cocoa solids, resulting in a glossy, smooth finish.
Can I make these bars ahead of time and freeze them?
Yes, freezing works very well for long term storage. Wrap individual squares tightly in plastic wrap, then place them in a freezer bag; they keep perfectly for up to three months.
How do I ensure the base doesn't turn out crumbly?
Let the mixed dough rest for 2 minutes before pressing it into the pan. This short rest allows the almond flour to fully hydrate and absorb the syrup and oils, creating a stable, non-crumbly matrix similar to the hydration control needed in recipes like our Fudgy Brownies From recipe.
No Bake Peanut Butter Bars

