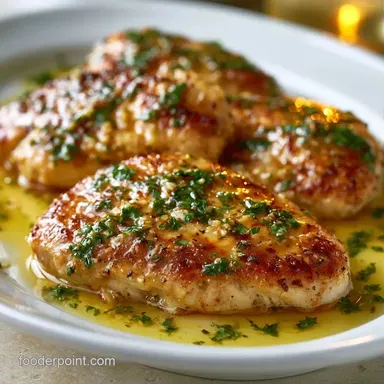
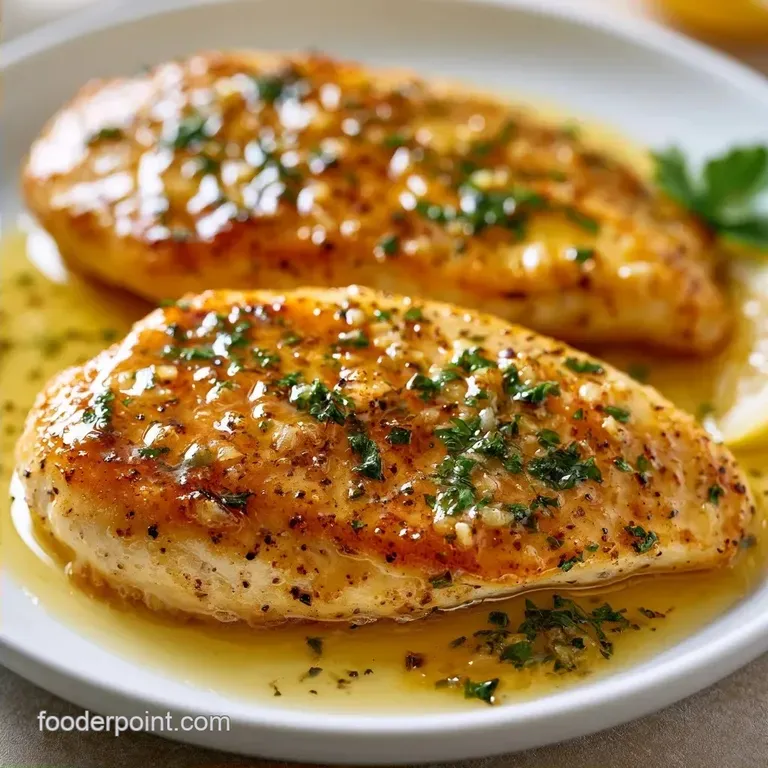
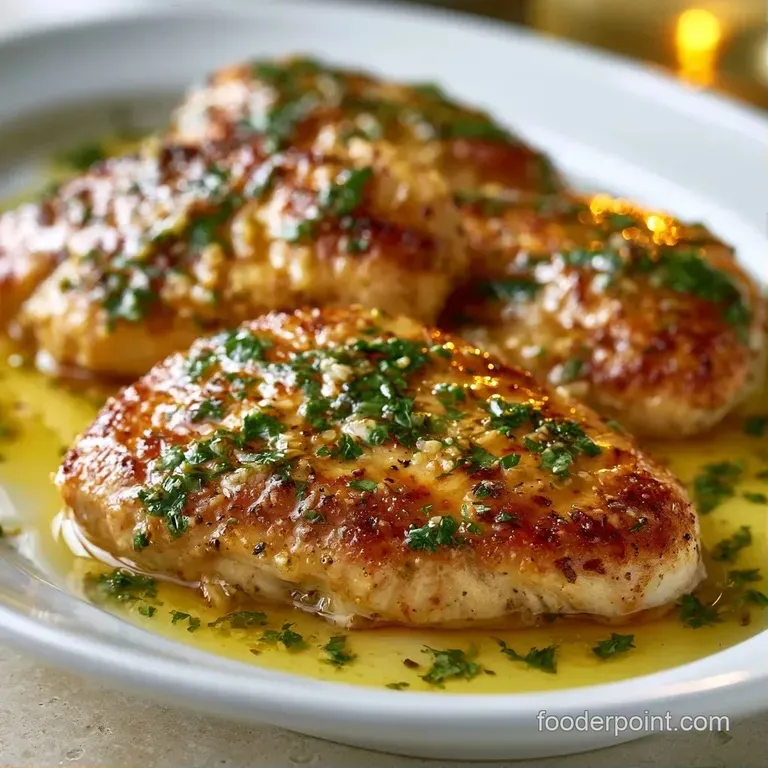
Pan-Fried Lemon Garlic Chicken Breast: Tender & Juicy
- Time: 10 min prep + 15 min cook = Total 25 mins
- Flavor/Texture Hook: Mahogany brown crust with a velvety, tangy sauce
- Perfect for: Busy weeknights or high protein meal prep
Lemon Garlic Chicken Breast
That loud, aggressive sizzle when the meat hits the hot oil is the best part of my evening. There is something about the smell of garlic hitting melted butter that just tells my brain it's time to relax.
I remember the first time I tried making this, I didn't pound the chicken, and I ended up with one side that was charcoal and another side that was barely cooked. It was a mess, but it taught me that consistency is everything.
Since then, I've leaned into the "budget smart" approach. You don't need fancy organic cuts or expensive oils to make this work. The real hero here is the lemon. Fresh lemon juice cuts through the richness of the butter, brightening the whole plate and making a simple piece of protein feel like a restaurant dish.
This 30 Minute Chicken Breast with Lemon Garlic is the perfect quick and flavorful dinner.
We're aiming for a specific result here: a golden brown exterior and a center that's just barely opaque. By using a few simple tricks with the heat and the timing, we can avoid the rubbery texture that usually plagues chicken breast.
Trust me, once you see that mahogany crust form, you'll never go back to bland, poached chicken.
Why You'll Love This
Actually getting the texture right on a breast with lemon garlic is all about managing the heat. Most people overcook the meat because they're afraid of undercooking it, but the carryover heat does a lot of the work for you.
I love this recipe because it uses basic pantry staples but delivers a flavor packed result that feels balanced and clean.
It's also incredibly efficient for those of us who meal prep. You can slice the leftovers and toss them over a salad the next day, and the sauce keeps the meat from drying out in the fridge.
Plus, it's naturally low carb, which makes it a great fit for anyone watching their sugar intake without feeling like they're on a restrictive diet.
If you're looking for a way to liven up your protein, this is it. The acidity of the lemon acts as a natural tenderizer, and the garlic provides that savory depth that makes the dish feel complete. It's simple, honest cooking that focuses on flavor integrity over fancy presentation.
The Secret to the Texture
- Uniform Thickness: Pounding the meat ensures every square inch hits the pan at the same time, preventing dry edges.
- Pan Deglazing: Using chicken broth to scrape up the brown bits (the fond) incorporates all that concentrated meat flavor back into the sauce.
- Cold Butter Finish: Stirring in a knob of cold butter at the end creates a velvety emulsion that thickens the sauce without needing flour.
- Resting Period: Letting the meat sit for a few minutes allows the juices to redistribute, so they don't all run out on the plate.
| Feature | Fresh Ingredients | Shortcut Version | Result Impact |
|---|---|---|---|
| Lemon | Fresh Squeezed | Bottled Juice | Bottled is more acidic/bitter; fresh is aromatic |
| Garlic | Fresh Cloves | Garlic Powder | Powder lacks the pungent, savory depth of fresh |
| Broth | Low Sodium Stock | Water + Salt | Water lacks the gelatin and depth of real broth |
Ingredient Deep Dive
I've found that the quality of your fat sources really dictates the final mouthfeel of the sauce. Using a mix of olive oil and butter gives you the high smoke point needed for the sear and the creamy finish needed for the sauce.
| Ingredient | Science Role | Pro Secret |
|---|---|---|
| Chicken Breast | Main Protein | Pound to 1 inch for even cooking |
| Unsalted Butter | Flavor & Thickener | Add the last tbsp cold to create a glossy glaze |
| Lemon Juice | Acid/Tenderizer | Squeeze fresh to avoid the "metallic" bottled taste |
| Garlic | Aromatics | Mince finely to prevent burning in the pan |
The Ingredient List
For this recipe, I stick to a few high impact items. I always use unsalted butter because it lets me control the salt levels, especially since the chicken broth can vary in sodium content.
- 1.5 lbs chicken breasts Why this? Pounded to 1 inch thickness for uniform heat distribution
- 1/2 tsp salt
- 1/2 tsp black pepper
- 2 tbsp olive oil Why this? High smoke point prevents burning during the initial sear
- 3 tbsp unsalted butter
- 4 cloves garlic, minced
- 1/4 cup chicken broth Why this? Adds savory depth and helps deglaze the pan
- 2 tbsp fresh lemon juice
- 1 tsp lemon zest
- 1 tbsp fresh parsley, chopped
Budget Smart Substitutes
| Original Ingredient | Substitute | Why It Works |
|---|---|---|
| Chicken Broth (1/4 cup) | Dry White Wine (1/4 cup) | Similar acidity. Note: Adds a more sophisticated, tart profile |
| Unsalted Butter (3 tbsp) | Ghee or Coconut Oil | High fat content. Note: Coconut oil adds a slight sweetness |
| Fresh Parsley (1 tbsp) | Dried Parsley (1 tsp) | Similar look. Note: Much less punchy flavor than fresh |
Since we're focusing on a balanced plate, you might want to consider the sides. If you're in the mood for something hearty, this pairs well with my Lemon Chicken Gnocchi recipe, which shares that same bright, citrusy profile.
Necessary Kitchen Tools
You don't need a professional kitchen for this, but a few specific tools make the process way easier. If you don't have a meat mallet, the bottom of a heavy skillet or a rolling pin works just as well.
- Heavy Skillet: Stainless steel or cast iron is a must. Non stick pans don't develop that mahogany crust we're after.
- Meat Mallet: Essential for getting that 1 inch thickness.
- Tongs: For flipping the chicken without piercing the meat and losing juices.
- Whisk or Spoon: For emulsifying the butter into the lemon sauce.
The step-by-step Process
Right then, let's crack on. The key here is not to crowd the pan. If you put too much meat in at once, the temperature drops, and the chicken will steam instead of sear.
1. Prep and Leveling
Pat the chicken breasts completely dry with paper towels. This is non negotiable; moisture on the surface creates steam, which kills the crust. Use a meat mallet to pound the thickest part of the breast until the entire piece is an even 1 inch thickness. Season both sides generously with salt and pepper.
2. Achieving the Mahogany Sear
Heat olive oil in a large stainless steel or cast iron skillet over medium high heat until it shimmers. Add the chicken and sear without moving them for 5–7 minutes per side until a deep, mahogany colored crust forms. Remove the chicken to a plate and let it rest.
3. Building the Velvety Pan Sauce
Lower the heat to medium. Add 2 tbsp of butter and the minced garlic to the pan. Sauté for 30 60 seconds until fragrant but not brown. Be careful here; burnt garlic tastes bitter and will ruin the sauce.
4. The Reduction Phase
Pour in the chicken broth and lemon juice, scraping the bottom of the pan to release the browned bits. Simmer for 3 minutes until the liquid is reduced by half. This concentrates the flavor and thickens the consistency.
5. The Final Glaze
Stir in the lemon zest and the remaining 1 tbsp of cold butter to thicken the sauce. Return the chicken to the pan, spooning the sauce over the top. Let it warm through for about 1 minute before serving.
Chef's Note: If the sauce looks too thin, just simmer it for another minute before adding the final butter. If it's too thick, a splash of water or extra broth will loosen it right up.
Pro Tips and Pitfalls
Cooking chicken breast is a balancing act. One minute it's juicy, the next it's a rubber band. I've spent way too much time overcooking mine to realize that the pan is often hotter than we think.
To Avoid Rubberiness
The biggest mistake is cooking the meat on too high a heat for too long. Use a digital thermometer to hit an internal temperature of 160°F (71°C) and then pull it off the heat. According to the USDA Food Safety guidelines, the final temperature should reach 165°F, but the carryover heat while resting will get you there without drying out the meat.
To Prevent Burnt Garlic
Garlic burns in seconds once butter starts to bubble. Always add the garlic after the oil has been used for the sear and once you've dropped the heat to medium. If you see the garlic turning dark brown, immediately pour in your broth to stop the cooking process.
To Stop Sauce Separation
If your sauce looks greasy or "broken," it's usually because the heat was too high when you added the butter. The trick is to whisk in the cold butter at the very end, off the main heat source, which creates a stable emulsion.
| Problem | Root Cause | Solution |
|---|---|---|
| Chicken is dry/tough | Overcooked or not pounded | Use a thermometer; pound to 1 inch |
| Sauce is too tart | Too much lemon or low reduction | Simmer longer or add a pinch of sugar |
| Garlic tastes bitter | Overheated garlic cloves | Add garlic only at medium heat |
Common Mistakes Checklist
- ✓ Did you pat the chicken dry? (Prevents steaming)
- ✓ Did you pound the meat to 1 inch? (Ensures even cooking)
- ✓ Did you let the chicken sear without moving it? (Creates the crust)
- ✓ Did you add the final butter while it was cold? (Prevents separation)
- ✓ Did you let the meat rest before slicing? (Retains juices)
Smart Swaps and Variations
Depending on what you have in the fridge, you can tweak this recipe. Since we're going for a budget smart approach, don't feel like you need to buy a bunch of new ingredients.
For a Creamier Finish
If you want something more indulgent, stir in 2 tablespoons of heavy cream or a dollop of sour cream right before you add the chicken back to the pan. This turns the pan sauce into a rich, velvety cream sauce.
For a Baked Version
If you're cooking for a crowd, you can sear the chicken in batches, then place them all in a baking dish. Pour the prepared lemon garlic sauce over the top and bake at 375°F (190°C) for 10-12 minutes.
This is much easier than managing four separate pieces in a pan.
For dairy-free Needs
Swap the butter for a high-quality vegan butter or simply use extra olive oil. Note that the sauce won't be as "velvety" without the milk solids from the butter, but the flavor will still be punchy and bright.
For 30 Minute Convenience
If you're really short on time, use a pre minced garlic jar and a squeeze bottle of lemon juice. While I don't recommend it for a fancy dinner, it works for a quick Tuesday night meal. Just be aware that the flavor will be slightly more muted.
| Desired Outcome | Action to Take | Impact on Dish |
|---|---|---|
| Extra Tangy | Add 1 tsp extra lemon zest | Brighter, more citrus forward |
| More Savory | Add 1/2 tsp onion powder | Deeper, more rounded flavor |
| Spicy Kick | Add a pinch of red pepper flakes | Adds warmth and a slight zing |
If you love a zesty sauce, you might also enjoy my Cowboy Butter recipe, which is a fantastic way to add flavor to almost any grilled protein.
Busting Kitchen Myths
There are a lot of old wives' tales in cooking that just aren't true. Let's clear some of these up so you can cook with confidence.
Searing "seals in" the juices. This is a total myth. Searing creates a crust that adds flavor and color, but it doesn't actually stop moisture from leaving the meat. The only way to keep the juices in is to not overcook the meat and let it rest.
You must use expensive organic breasts for flavor. Honestly, don't even bother with the overpriced cuts. As long as the meat is fresh and you pound it to the right thickness, the flavor comes from the seasoning and the pan sauce, not the price tag of the chicken.
Storage and Freshness Tips
If you have leftovers, don't just throw them in a container. To keep the meat from getting that "reheated chicken" taste, store the chicken and the sauce together.
Fridge Guidelines Place the chicken and sauce in an airtight glass container. It will stay fresh for 3-4 days. When reheating, I recommend doing it in a pan over medium low heat with a splash of water or broth to loosen the sauce.
Freezing Method You can freeze this dish for up to 2 months. However, the lemon sauce can sometimes break when frozen and thawed. To fix this, whisk in a tiny bit of butter or cream when you reheat it to bring the emulsion back together.
Zero Waste Tips Don't throw away the lemon hulls after zesting and juicing! You can toss them into a freezer bag with some herbs and use them later to flavor a homemade stock. If you have leftover chicken broth in the carton, freeze it in ice cube trays for the next time you need to deglaze a pan.
Perfect Pairing Ideas
Because this Lemon Garlic Chicken Breast is so bright and savory, you want sides that can either absorb the sauce or provide a fresh contrast.
For a Balanced Plate I love serving this with steamed asparagus or sautéed spinach. The bitterness of the greens balances the richness of the butter sauce. For a starch, a simple pile of fluffy jasmine rice or some roasted baby potatoes is the way to go.
For a Light Refreshment A crisp arugula salad with a light vinaigrette works wonders here. The peppery notes of the arugula complement the lemon perfectly. If you're feeling fancy, a chilled glass of Sauvignon Blanc mirrors the acidity of the dish and makes it feel like a complete experience.
For the Comfort Seekers Mash some cauliflower or potatoes and spoon the extra pan sauce right over the top. It turns a healthy protein into a comforting meal that feels substantial without being too heavy.
Recipe FAQs
Is 30 minutes enough to cook chicken breast in the oven?
Yes, but this pan-sear method is faster. This specific recipe reaches a mahogany crust and full doneness in just 15 minutes of cook time.
How to bake chicken breast with lemon and garlic?
Pound the chicken to an even 1 inch thickness. Season with salt and pepper, sear in a skillet for 5-7 minutes per side, and finish with a reduced lemon garlic pan sauce for the best texture.
Can a diabetic eat baked chicken?
Yes, it is a safe, low-carb option. This recipe uses fresh lemon and garlic, avoiding the added sugars found in many commercial marinades.
How long to marinate chicken with lemon and garlic?
No marinating is needed for this recipe. Pounding the meat and creating a pan sauce provides intense flavor in only 25 total minutes.
What's a great, but simple, chicken breast recipe?
This Lemon Garlic Chicken is an ideal choice. It is quick to prepare and pairs perfectly with garlic mashed potatoes for a complete meal.
What are your favorite healthy recipes using chicken breasts?
Lean, pan-seared breasts with citrus sauces are top picks. They provide high protein and bright flavor without relying on heavy creams or sugars.
Why do I need to pound the chicken breast?
It ensures the meat cooks evenly. Pounding the breast to a consistent 1 inch thickness prevents the thin end from drying out while the thickest part finishes.
Lemon Garlic Chicken Breast