Hearty Chicken Rice Skillet
- Time: 10 min active + 45 min cooking
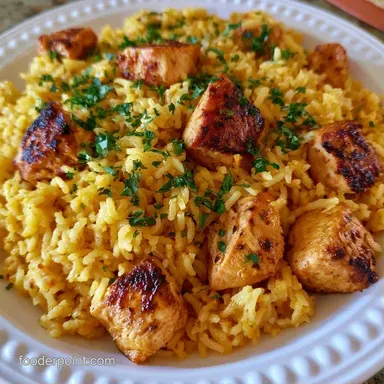
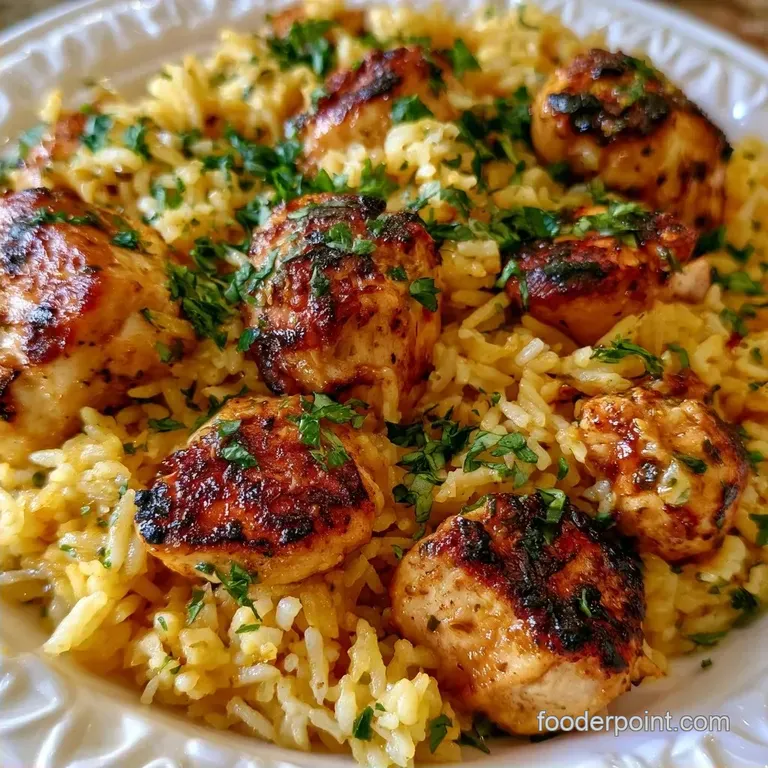
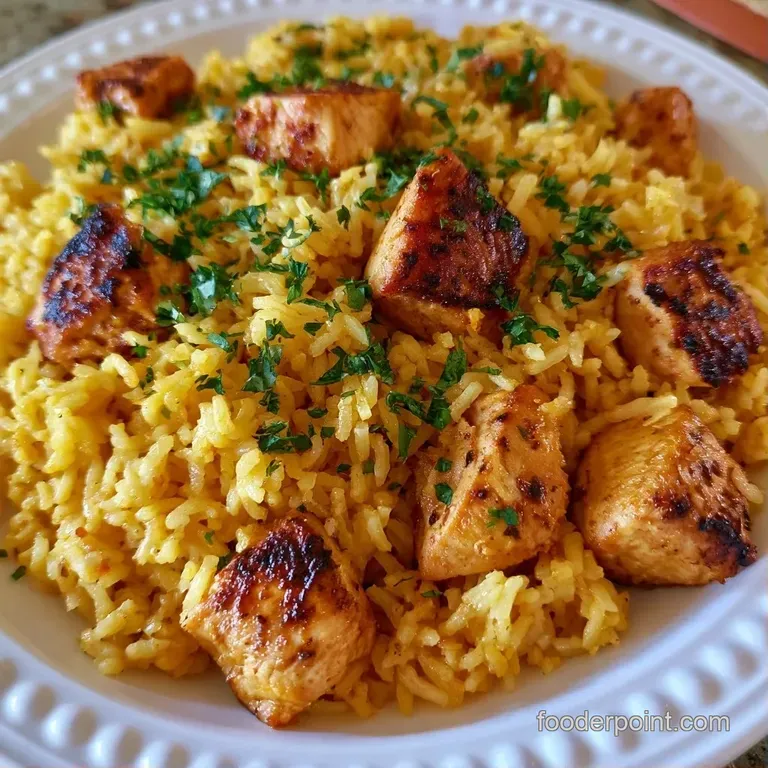
- Flavor/Texture Hook: Mahogany chicken crust with fluffy, savory rice
- Perfect for: budget-friendly weeknight dinners
- Chicken Rice Skillet: Hearty One Pan Meal
- The One Thing That Changes Everything
- The Building Blocks
- The Essential Pantry List
- Equipment Needed
- Key Steps
- Pro Tips and Pitfalls
- Troubleshooting Common Issues
- Make It Your Own
- Busting Kitchen Myths
- Make-Ahead and Leftover Tips
- Perfect Complements
- High in Sodium
- Recipe FAQs
- 📝 Recipe Card
Chicken Rice Skillet: Hearty One Pan Meal
The smell of browning butter and toasted rice hitting a hot pan is enough to make anyone hungry. There's something about that specific aroma, a mix of nuttiness and savory chicken, that just feels like home. It's the kind of scent that drifts through the house and tells everyone dinner is almost ready.
I used to just boil rice and chicken in separate pots, which is boring and means more scrubbing later. I tried a few different methods before realizing that searing the meat first creates a base of flavor that you just can't get from simmering everything together from the start.
This approach gives the meat a crust and the rice a depth that makes the whole meal feel more substantial.
You can expect a Chicken Rice Skillet that's comforting and filling without breaking the bank. We're using simple pantry staples to create a dish that tastes like it spent hours on the stove. It's all about the order of operations here, ensuring each ingredient gets the right amount of heat.
The One Thing That Changes Everything
To get the best results with this Chicken Rice Skillet, you have to focus on the texture of the grain. Most people just dump everything in and hope for the best, but that's how you get mushy rice.
Toasting Grains: Heating the rice in butter before adding liquid coats the starch, which prevents the grains from clumping together.
Fond Release: Using white wine to deglaze the pan pulls up the browned chicken bits, mixing those concentrated flavors directly into the rice.
Right then, let's look at how this method stacks up against other ways of cooking a one pot meal.
| Method | Time | Texture | Best For |
|---|---|---|---|
| Stovetop | 60 mins | Distinct grains | Weeknight speed |
| Oven Bake | 90 mins | Softer, casserole like | Large crowds |
| Slow Cooker | 6 hours | Very soft | Set and forget |
The Building Blocks
Understanding why we use these specific items helps when you're staring at a near empty pantry. Every part of this Chicken Rice Skillet serves a purpose, from the acidity of the lemon to the fat in the butter.
| Ingredient | What It Does | Best Swap |
|---|---|---|
| Long grain White Rice | Provides structure and bulk | Basmati or Jasmine |
| Chicken Broth | Adds salt and savory depth | Vegetable broth |
| Dry White Wine | Cuts through fat with acidity | Extra lemon juice |
| Butter | Adds richness and helps toast rice | Ghee or Oil |
The Essential Pantry List
Gather these ingredients before you turn on the heat. I've listed these in metric to keep things precise, but a standard measuring cup works too.
- 680g boneless, skinless chicken breasts, cut into 1 inch cubes Why this? Lean and budget friendly (Substitute: Chicken thighs for more fat)
- 15ml olive oil (Substitute: Avocado oil)
- 30g unsalted butter (Substitute: Margarine)
- 1 medium yellow onion, finely diced (Substitute: Shallots)
- 3 cloves garlic, minced (Substitute: 1 tsp garlic powder)
- 5g salt (Substitute: Sea salt)
- 2g black pepper (Substitute: White pepper)
- 2g dried oregano (Substitute: Dried thyme)
- 200g long grain white rice, rinsed well Why this? Holds shape during simmering (Substitute: Parboiled rice)
- 475ml low sodium chicken broth (Substitute: Water with a bouillon cube)
- 120ml dry white wine (Substitute: Extra broth with a splash of vinegar)
- 150g frozen peas, thawed (Substitute: Frozen carrots or corn)
- 2 tbsp fresh parsley, chopped (Substitute: Dried parsley)
- 15ml lemon juice (Substitute: Lime juice)
Equipment Needed
You don't need a professional kitchen for this. A standard 12 inch oven safe skillet is the star here. If you don't have one, a deep stainless steel frying pan works just as well. I prefer stainless steel because it develops a better crust on the chicken than non stick pans do.
You'll also need a tight fitting lid. This is non negotiable. If the steam escapes, the rice won't cook evenly, and you'll end up with hard grains in the middle. If your lid has a vent, cover it with a piece of foil to keep the moisture locked in.
Key Steps
Searing for Depth
Heat the 15ml olive oil in your skillet over medium high heat. Season your 680g chicken cubes with salt, pepper, and oregano. Add the chicken in a single layer. Don't stir it for 3-4 minutes until a mahogany colored crust forms.
Flip the pieces and brown for another 3 minutes, then move the chicken to a plate.
Building the Base
Drop the heat to medium and melt the 30g butter. Toss in the diced onion and sauté for 4-5 minutes until translucent. Stir in the minced garlic and cook for just 1 minute until it smells fragrant.
Toasting and Simmering
Add the 200g rinsed rice to the skillet. Stir constantly for 2-3 minutes until the edges of the grains look translucent and smell nutty. Pour in the 475ml broth and 120ml white wine. Scrape the bottom of the pan to release the brown bits.
Bring the liquid to a boil, then stir the browned chicken and any juices back into the pan.
Finalizing the Texture
Cover the pan with a tight lid and turn the heat to low. Simmer for 18-20 minutes. Do not lift the lid. Turn off the heat and gently fold in the 150g thawed peas and fresh parsley. Drizzle with 15ml lemon juice. Let the pan rest, covered, for 5 minutes before serving.
Chef's Note: Rinsing the rice is the one step most people skip. I once forgot to rinse the rice and ended up with a gummy porridge instead of distinct grains. Wash the rice until the water runs clear to remove excess surface starch.
Pro Tips and Pitfalls
The most common issue with a Chicken Rice Skillet is the texture of the rice. If you stir it too much while it simmers, you break the grains and release starch, which makes the dish creamy rather than fluffy.
Troubleshooting Common Issues
| Issue | Solution |
|---|---|
| Why Your Rice Is Mushy | This usually happens because of too much liquid or excessive stirring. If you use a lid that leaks steam, you might be tempted to add more broth, which ruins the ratio. |
| Why Your Chicken Is Dry | Overcooking the chicken during the initial sear or the final simmer is the culprit. Using thighs instead of breasts is a great way to avoid this, as they handle heat much better. |
| Why the Bottom Is Burnt | This happens when the heat is too high during the simmering phase. Once the lid goes on, the heat must be low. |
Make It Your Own
This recipe is a great base for different flavors. If you want to lean into a cheesy chicken rice style, stir in a cup of shredded cheddar during the final resting period. The residual heat will melt the cheese into a rich, gooey sauce.
For a Mexican Chicken and Rice Skillet, swap the oregano for cumin and paprika. Replace the white wine with a splash of lime juice and stir in some canned black beans and corn along with the peas. It's a fast way to change the whole vibe of the meal.
If you're looking for a lighter option, you can find tips in my Chicken Rice Meal Prep recipe guide. To boost the veggie count here, add diced bell peppers and carrots during the onion sauté.
Adjusting Portion Sizes
When scaling this Chicken Rice Skillet down to two servings, use a smaller 8 inch pan. Reduce the simmer time by about 20% because a smaller mass of food heats through faster.
For doubling the recipe, don't just double the spices. Increase salt and oregano by 1.5x instead. If you double the liquid and rice, you'll likely need to work in batches for searing the chicken to avoid crowding the pan, which would cause the meat to steam instead of brown.
Busting Kitchen Myths
Searing the chicken doesn't "seal in the juices." That's an old myth. Moisture loss happens regardless of how you start. However, searing creates a mahogany crust that adds a deep, savory flavor to the whole Chicken Rice Skillet.
Some people think you should stir the rice every few minutes to ensure it cooks evenly. In reality, stirring releases starch and makes the rice gummy. Trust the steam and leave the lid alone.
Make-ahead and Leftover Tips
This dish keeps well in the fridge for 3-4 days. Store it in an airtight container to keep the rice from drying out. When you're ready to eat, add a tiny splash of water or broth before microwaving. This creates a bit of steam and brings the moisture back to the grains.
You can freeze this for up to 2 months. I recommend freezing it in individual portions. Thaw it in the fridge overnight before reheating on the stove over low heat.
To avoid waste, use the chicken trim or bones from your breast fillets to make a quick stock for the next time you make a Rice Skillet. Even the onion peels and carrot ends can go into a freezer bag for a future veggie broth.
Perfect Complements
Since the Chicken Rice Skillet is quite hearty, it pairs best with something fresh and acidic. A simple arugula salad with a lemon vinaigrette cuts through the richness of the butter. Steamed broccoli or roasted asparagus also work well, adding a bright green snap to the plate.
If you have extra time, a side of sliced cucumbers with rice vinegar and sesame seeds provides a cool contrast to the warm, savory rice. It turns a simple weeknight dinner into a complete, balanced meal.
High in Sodium
950 mg 950 mg of sodium per serving (41% 41% of daily value)
The American Heart Association recommends a limit of 2,300mg of sodium per day for most adults to reduce the risk of cardiovascular disease.
Tips to Reduce Sodium
-
Swap the Broth-30%
Replace the low-sodium chicken broth with no-salt added chicken broth or water to significantly lower the base sodium content.
-
Reduce Added Salt-25%
Omit or reduce the 1 tsp of salt; the broth and other seasonings provide enough flavor to make this possible.
-
Boost the Acidity-10%
Increase the lemon juice or add a teaspoon of apple cider vinegar to brighten the flavor, which reduces the craving for salt.
-
Amplify Aromatics-5%
Add an extra clove of minced garlic or increase the diced onion to build a deeper savory profile without adding sodium.
-
Enhance with Herbs
Double the dried oregano and fresh parsley to create a more robust, aromatic dish that doesn't rely on salt for taste.
Recipe FAQs
Is this chicken rice skillet healthy?
Yes, it is a balanced meal. It focuses on lean protein and fresh vegetables while using olive oil and broth instead of heavy creams.
Can I use cream of chicken soup or Campbell's in this recipe?
No, canned soups are not used here. This method creates a savory sauce by deglazing the pan with white wine and chicken broth.
Is this a simple dinner recipe with few ingredients?
Yes, it uses basic pantry staples. The entire meal is prepared in one 12 inch skillet, which significantly reduces cleanup.
How to make this chicken and rice skillet?
Sear seasoned chicken in olive oil, then sauté onions and garlic in butter. Toast the rice, stir in broth and wine, and simmer covered for 18 20 minutes before folding in peas, parsley, and lemon juice.
Is it true that stirring the rice during the simmer ensures it cooks evenly?
No, this is a common misconception. Stirring during the simmer phase releases too much starch and leads to mushy rice.
Why is my chicken coming out dry?
Overcooking during the initial sear or final simmer is the cause. Remove the chicken from the pan immediately after it browns and avoid over simmering.
What should I serve with this chicken and rice?
Fresh steamed greens or a crisp salad pair perfectly. To add more flavor, you can top the dish with a zesty compound sauce.
Chicken Rice Skillet